A freshly baked No-Knead Beetroot Focaccia is as beautiful as it is delicious. The deep pink hue, created by beetroot juice, makes this loaf stand out on any table. Beyond its striking appearance, this focaccia is surprisingly easy to make. It requires absolutely no kneading and minimal hands-on time. Light, fluffy, and infused with earthy sweetness, this is a bread worth adding to your baking repertoire.
Table of Contents
- Ingredient Breakdown
- The Secret to a Perfect No-Knead Dough
- The Role of Hydration in No-Knead Doughs
- Mastering the Art of Dimpling
- Baking for the Perfect Crisp and Colour
- More Beetroot Recipes
Ingredient Breakdown
- Beetroot: Adds natural colour, mild sweetness, and moisture to the dough.
- Water: Blends with beetroot to create a vivid, flavourful liquid base.
- Yeast: Essential for fermentation, helping the bread rise and develop flavour.
- Honey: Feeds the yeast and adds a subtle hint of sweetness.
- White bread flour: High protein content ensures a strong gluten structure.
- Sea salt: Enhances flavour and balances the natural sweetness of beetroot.
- Extra-virgin olive oil: Adds richness and ensures a crisp, golden crust.
- Butter or greaseproof paper: Prevents the focaccia from sticking to the pan.
The Secret to a Perfect No-Knead Dough
Traditional bread-making relies on kneading to develop gluten, but this No-Knead Beetroot Focaccia takes a different approach. The secret lies in extended fermentation, which allows gluten strands to form naturally. This slow development creates a dough that is light, airy, and full of flavour.
To start, the beetroot is blended with water, producing a striking magenta juice. Warming this liquid slightly before mixing it with yeast and honey helps activate the yeast, ensuring the bread rises properly. Once combined with flour and salt, the dough may seem wet and sticky. This is exactly what you want. A wetter dough leads to a more open crumb and a tender, fluffy texture.
Coating the dough in generous amounts of olive oil prevents it from drying out while enhancing flavour. The key to success is patience: leaving the dough to rise for at least four hours allows fermentation to work its magic. For even more depth of flavour, an overnight rise in the fridge develops a slight tang and improves texture.
The Role of Hydration in No-Knead Doughs
One of the defining features of this No-Knead Beetroot Focaccia is its high hydration. Unlike traditional bread doughs, which require kneading to develop gluten, this focaccia relies on water content and time to create an airy, structured crumb.
Hydration refers to the ratio of liquid to flour, and in this recipe, the beetroot juice acts as both a flavour enhancer and a moisture source. With a wet, sticky consistency, this dough allows gluten to develop gradually through a process called autolysis, where flour absorbs water and proteins start forming long, elastic strands. Over time, this creates a beautifully soft and chewy texture without any kneading.
However, working with high-hydration doughs requires a shift in technique. Instead of handling the dough traditionally, use folding and stretching to create structure. The gentle lifting and folding method incorporated before the second rise helps distribute air bubbles evenly. This ensures the focaccia rises properly and achieves that signature pillowy texture.
For those who are new to high-hydration baking, resisting the urge to add extra flour is essential. The stickiness might feel unfamiliar, but embracing the wet texture results in a better crumb and a more delicate, tender loaf.
Mastering the Art of Dimpling
One of the most recognisable features of any focaccia is its deep dimples, which give the bread its signature rustic appearance. But dimpling is not just for aesthetics. It plays a crucial role in ensuring even baking and flavour distribution.
Pressing your fingers firmly into the dough creates little pockets where olive oil pools, infusing the focaccia with richness as it bakes. This technique also prevents excessive rising in certain spots, ensuring the dough bakes evenly rather than forming an uneven surface.
For best results, oil your fingers before dimpling to prevent sticking and ensure you get deep, defined indentations. The goal is to press down firmly enough to leave lasting impressions without fully deflating the dough. If you prefer a crisper crust, you can brush a little extra olive oil over the surface before baking.
This step is also a great time to add toppings, such as flaky sea salt, fresh herbs, or even thinly sliced onions, allowing them to settle into the dough and bake into the surface.
Baking for the Perfect Crisp and Colour
A hot oven is essential for achieving the perfect focaccia texture. Baking at 220°C ensures the outside crisps up beautifully while keeping the inside soft and airy. The moment you place the focaccia in the oven, the heat causes the trapped air bubbles to expand, resulting in a light and airy crumb.
The baking time varies slightly depending on your oven, but 25 to 30 minutes is the sweet spot. The focaccia is ready when it turns golden brown around the edges and begins pulling away from the sides of the tin. If you prefer a slightly crunchier crust, leave it in for an extra two to three minutes. Once baked, allow the bread to cool slightly before slicing. It’s best enjoyed warm when the flavours are at their peak.
More Beetroot Recipes
If you enjoyed the flavours in this No-Knead Beetroot Focaccia, then I have some more beetroot-based recipes for you to try:
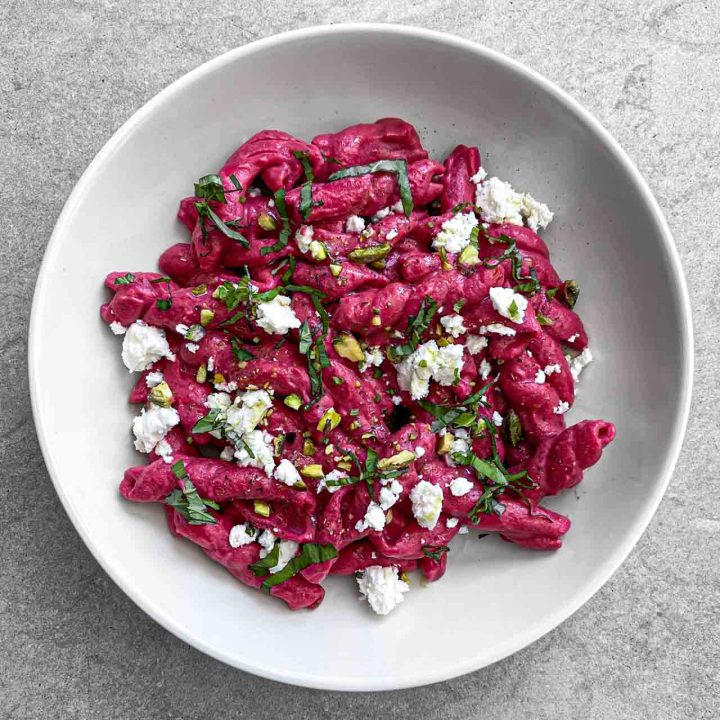
- Beetroot and Feta Pasta: This pink pasta has the perfect balance with the tangy, saltiness of the feta taming the earthy sweetness of the beetroot.
- Beetroot Pan con Tomate: This bright, flavour-packed take on the beloved Spanish staple brings together the rich sweetness of vine tomatoes, the deep earthiness of beetroot, and the irresistible crunch of garlicky sourdough.
See how I make these recipes and more over on my Instagram!
No-Knead Beetroot Focaccia

This beautifully pink loaf is absolutely delicious and much easier to make than you might think. No kneading and no fancy equipment required! Enjoy it plain or top it with your favourite topping(s).
- Prep Time: 20 minutes
- Total Time: 8 hours
- Yield: 12 1x
Ingredients
- 650 g beetroot, raw, peeled and quartered
- 500 ml water
- 7 g yeast, fast active dried yeast
- 1 tbsp honey, runny
- 675 g white bread flour, strong
- 10 g sea salt, fine
- 6 tbsps extra-virgin olive oil, high-quality, divided
- butter, for greasing, or greaseproof paper
Instructions
- Blend the beetroot with the water then press the mixture through a sieve to get the beetroot juice. You’ll need 500ml.
- Heat the beetroot juice in the microwave or in a small saucepan over low heat until lukewarm then transfer to a large bowl.
- Whisk in the yeast and honey and let sit for 5 minutes. It should get foamy, or at the very least, creamy. If it doesn’t, your yeast is dead and you’ll need to start again with fresher yeast.
- Add the flour and salt and mix with a rubber spatula (or wooden spoon) until a shaggy dough forms and there are no dry streaks. It should look and feel wet and sticky. Wet dough = super fluffy focaccia!
- Pour 4 tbsp extra-virgin olive oil in a large bowl – emphasis on large, the dough will rise a lot! Transfer the dough to the bowl and turn to coat in the oil.
- Cover with cling film and let sit at room temperature for 4 hours, or until doubled in size. It should look very bubbly. For an even more flavourful focaccia, cover the dough with cling film and refrigerate it for 8 to 12 hours.
- Line a 38cm x 26cm (approx.) roasting tin with greaseproof paper or grease generously with butter. This step might seem excessive, given the amount of olive oil this recipe calls for, but helps prevent sticking, especially if you’re using a glass dish. Pour 1 tbsp olive in the centre of the tin.
- Back to the dough. It should now be wet, bubbly and very fluffy. We’re now going to deflate the dough using a technique I learned from @alexandracooks. Using two forks, release the dough from one side of the bowl and pull it up and over into the middle of the bowl. Turn the bowl 90 degrees and repeat. Do this two more times – this will help deflate the dough and form it into a rough ball.
- Using your hands, transfer the dough to the prepared baking tin. Pour any oil left in the bowl over the dough and turn to coat in the oil. Cover and let rise in a dry, warm place for 2 to 4 hours, or until doubled in size.
- Place a rack in the middle of your oven and heat it to 220C.
- To check if the dough is ready to bake, press it gently with your finger. If ready, it will leave a small indentation that slowly springs back.
- When the dough is ready to bake, lightly oil your fingers and dimple the focaccia all over, stretching the dough to fill the dish (if necessary). You want to be aggressive with the dimpling – the goal is to create lots of deep dimples.
- Bake the focaccia for 25 to 30 minutes, or crisp and pulling away from the sides of the pan. Cut into squares and serve warm – enjoy!