The Best Fried Chicken
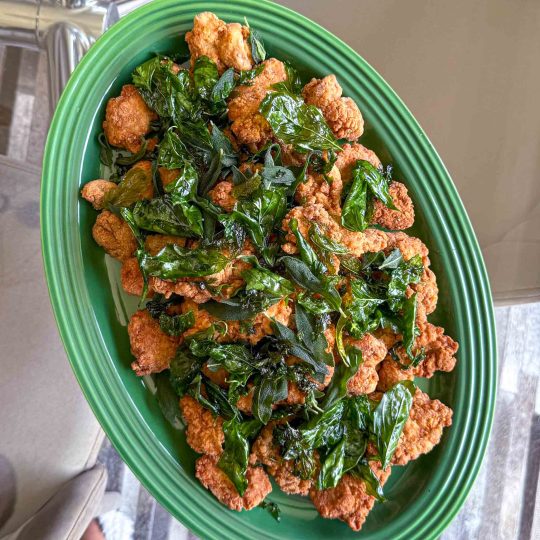
This is sure to be THE best fried chicken you’ve ever made. I’ve made it very, very fancy by adding fried herbs and caviar, but even without it, it’s truly spectacular. Brining the chicken thigh fillets overnight seasons them from the inside out and makes them nice and juicy. As for the coating, I’ve nailed down the perfect ratio of flour to cornstarch, seasoned with just the right amount of spices, resulting in the crispiest, most delicious coating. Finally, borrowing from the fried chicken connoisseur himself, Carl Clarke, this recipe uses a unique dry-wet-dry dredging technique that makes the coating light and crispy instead of thick and dense, which can be a real problem in fried chicken recipes.
- Prep Time: 30 minutes
- Total Time: 1 hour (plus brining time)
- Yield: 4 1x
Ingredients
For the brining:
- 500g chicken thigh fillets (or 1kg chicken wings)
- 1 litre water
- 4 tsp salt (it sounds like a lot but don’t worry, the chicken won’t absorb most of it)
For the breading and frying:
- 225g plain flour
- 75g cornstarch (cornflour)
- 1½ tsp salt
- 1½ tsp garlic granules
- 1½ tsp onion granules
- 1½ tsp cayenne pepper
- 2 large eggs
- 240 ml whole milk
Optional toppings:
- 40g fresh herbs, leaves only (we used a combination of sage, basil, parsley and mint leaves)
- caviar
Instructions
- Cut the chicken thigh fillets into 6 to 8 pieces. You should end up with medium-sized chunks that are bigger than chicken nuggets but still manageable chicken pieces.
- In a large bowl, whisk the water and salt until the latter dissolves. This is your brine.
- Add the chicken to the brine, then cover and refrigerate for a minimum of 12 hours and up to 24 hours. Don’t skip this step! It will season the chicken from the inside out and make it super juicy.
- In a large mixing bowl, combine the plain flour, cornstarch, salt, garlic granules, onion granules and cayenne pepper. This is your dry mix.
- In a separate large mixing bowl, whisk the eggs with the whole milk. This is your wet mix.
- Working one at a time, remove a piece of chicken from the brine and toss it in the dry mix, ensuring all surfaces are coated. Shake off the excess then drop the chicken into the wet mix to coat. Let the excess run off then drop the chicken back into the dry mix and toss again to coat. Transfer the coated to a large baking tray lined with a sprinkle of the dry mix (to soak up any excess moisture). Repeat with the remaining chicken.
- Fill a large, deep Dutch oven halfway up with vegetable oil. Set the Dutch oven over a medium-high heat and heat the oil to 180℃.
- Place a wire rack over a large baking tray – this is where you’ll transfer the cooked chicken too.
- Working in batches, fry the chicken for 5 to 6 minutes, or until deeply golden and crispy, then transfer to the wire rack to drain. Draining the chicken on the rack allows the air to circulate around it, keeping it nice and crispy. Keep warm in a low oven (100℃ to 120℃) while you fry the rest of the chicken.
- If making the fried herbs: make sure the herbs are clean and THOROUGHLY dried or they will splutter excessively. Reduce the heat to medium/medium-low – you want the oil to be between 135℃ and 150℃. Working in batches and using a slotted spoon, gently lower the herbs into the oil, being very, very careful of any splattering oil. Fry for 5 to 10 seconds, or until bright green, then drain on kitchen towel.
- To assemble, pile the chicken onto a large platter. Top with fried herbs, if using, and serve with caviar, if using. Alternatively, serve plain, drizzled with hot honey, or alongside your favourite condiments.
Find it online: https://zenaskitchen.com/the-best-fried-chicken/