
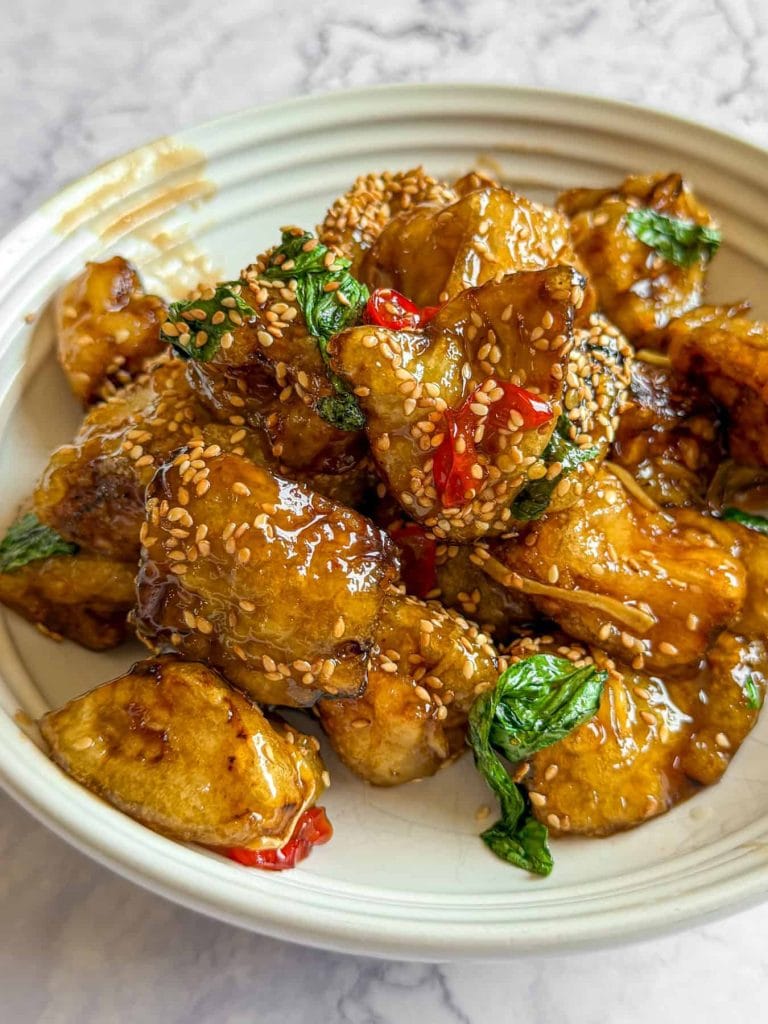
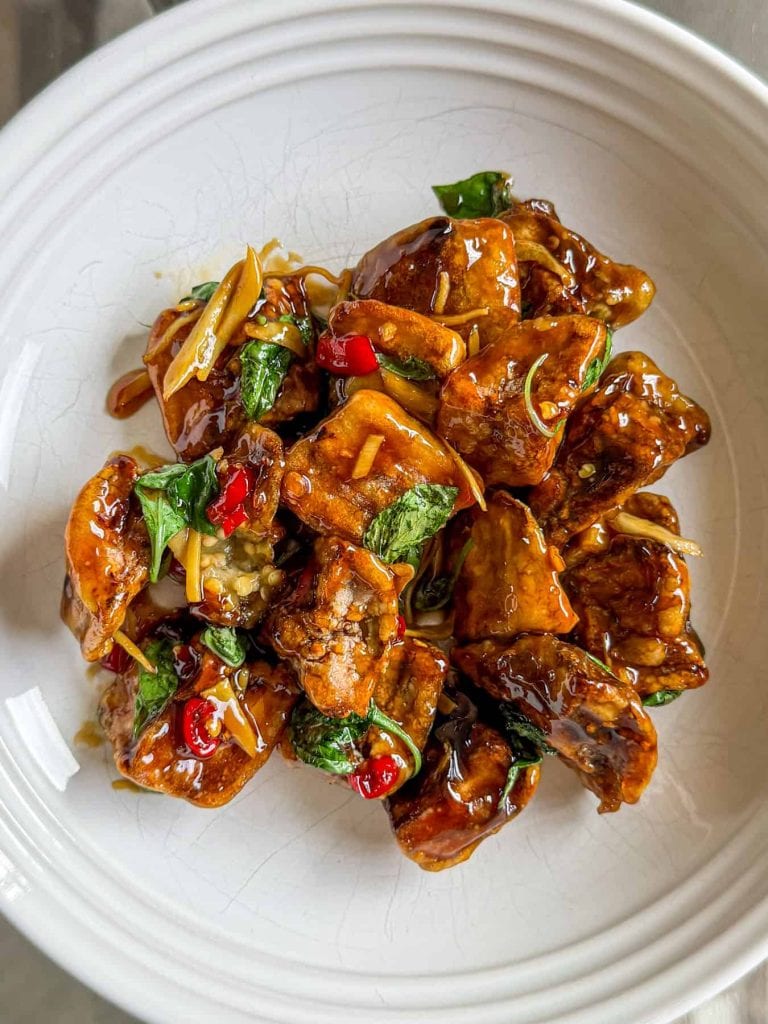
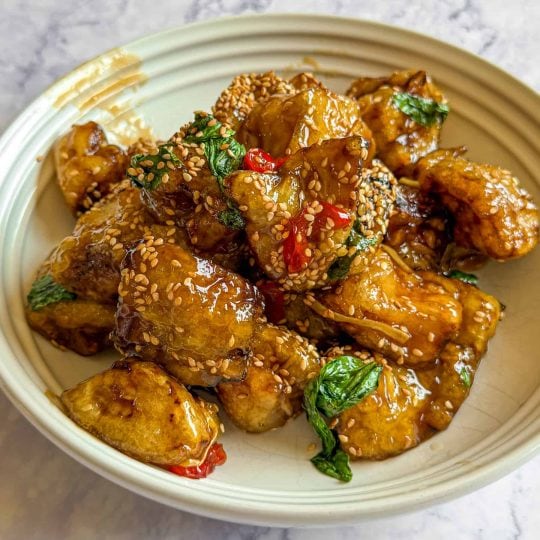
This Crispy Thai Aubergine is inspired by one of my favourite dishes at one of my favourite London restaurants: the aubergine pad phet at Singburi. It consists of twice-fried aubergine pieces tossed in a glossy, savoury-sweet glaze made with oyster sauce, fish sauce, chilli, garlic, galangal and Thai basil.
Now, I know what you’re thinking: how can something tossed in a sticky glaze possibly stay crispy? The answer is that it can’t, at least not forever. But that’s also what makes this dish so special. For a few glorious minutes, the aubergine is at peak crispness. Then, as the glaze begins to soften the coating, it transforms into something else entirely: sticky, chewy, silky and somehow just as delicious.
The secret lies in the technique. The aubergine is first salted to draw out excess moisture, then coated in tapioca flour and fried twice. The first fry gently cooks the aubergine until meltingly tender, while the second creates a crisp outer shell that stands up remarkably well to the glaze. Trust me, it’s worth the effort.
Table of Contents
- Why You’ll Love This Crispy Thai Aubergine
- What Makes This Crispy Thai Aubergine So Crispy?
- Key Ingredients for Crispy Thai Aubergine
- Ingredient Substitutions for Crispy Thai Aubergine
- Can I Make Crispy Thai Aubergine in an Air Fryer?
- What to Serve with Crispy Thai Aubergine
- How to Store and Reheat Crispy Thai Aubergine
- Frequently Asked Questions
Why You’ll Love This Crispy Thai Aubergine
If you’re anything like me, texture is just as important as flavour, and this Crispy Thai Aubergine recipe delivers on both fronts.
- The aubergine starts off wonderfully crispy before gradually softening into something sticky, chewy and silky.
- The glaze hits all the right notes: savoury, sweet, spicy and deeply umami.
- The contrast between the crisp exterior and the meltingly soft interior is genuinely addictive.
- Despite the impressive results, the technique itself is surprisingly straightforward.
- I’ve included an air fryer method if you’d prefer to avoid deep frying.
- Most importantly, it transforms the humble aubergine into something completely irresistible.
What Makes This Crispy Thai Aubergine So Crispy?
The short answer? Technique. The longer answer involves understanding exactly what happens to the aubergine at every stage of the cooking process. The salting, the starch coating, the double frying and even the timing of when the aubergine hits the glaze all contribute to the final texture.
What Is Tapioca Flour?
Tapioca flour, also known as tapioca starch, is extracted from the cassava root. It’s widely used throughout South America and Southeast Asia and happens to be one of my favourite starches for frying.
Unlike plain flour, tapioca flour contains no gluten or protein. This means that rather than creating a structured, bread-like crust, it forms a light, delicate coating that becomes exceptionally crisp when fried.
Compared to cornflour, tapioca flour produces a coating that’s lighter, crispier and almost glassy in texture. It also retains its crispness surprisingly well, which makes it particularly useful for dishes that are eventually tossed in sauce.
If you can’t find tapioca flour, potato starch is probably the closest substitute. Cornflour also works, though the final result won’t be quite as crisp.
You can usually find tapioca flour in Asian supermarkets, health food shops like Holland and Barrett and online. Many larger supermarkets also stock it these days. If you’re UK-based, you can find it in Tesco.
Why Salt the Aubergine?
If you’ve cooked aubergines before, you’ve probably come across the advice to salt them before cooking, like in my Aubergine Katsu Burger and Crispy Aubergine Puttanesca recipes.
Historically, this was done to remove bitterness. Thankfully, modern aubergines have largely been bred to eliminate that problem. These days, the main reason for salting aubergines is texture.
Aubergines contain a lot of water. By salting them and leaving them to sit for 30 minutes to an hour, you’re encouraging some of that moisture to leave the flesh. This has several benefits:
- The tapioca flour adheres more effectively.
- The aubergine fries more efficiently.
- The oil splatters less.
- Most importantly, the finished aubergine becomes crispier.
Why Double Fry the Aubergine?
Double frying is one of the best techniques for achieving maximum crispness.
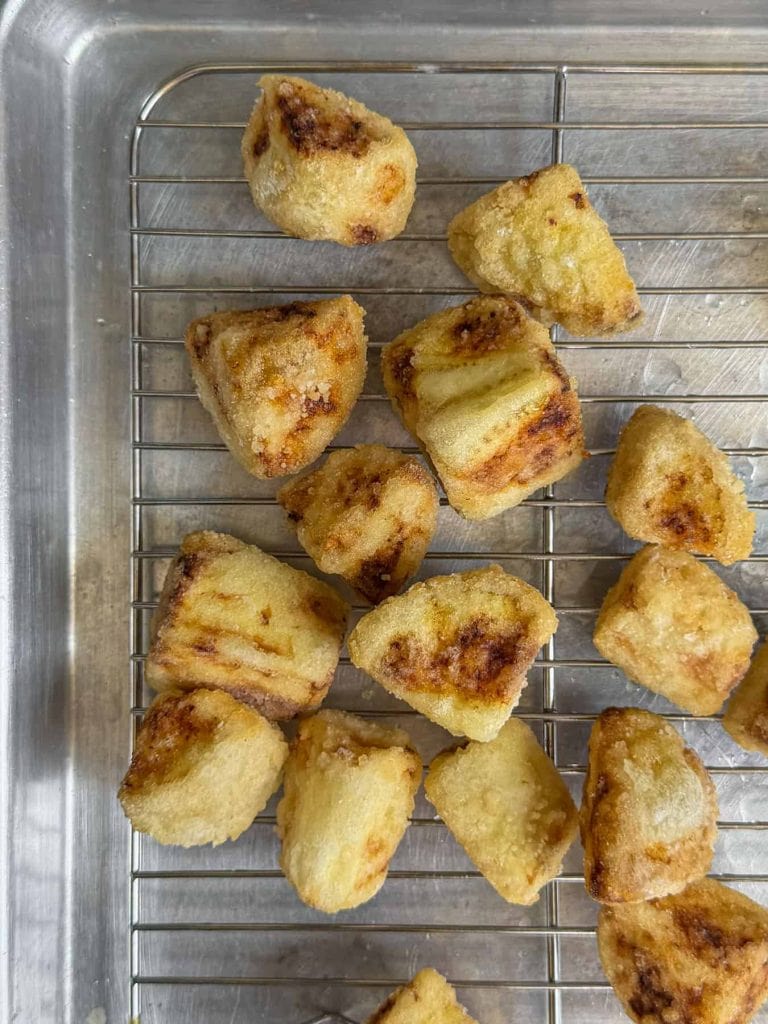
- The first fry takes place at 160°C. At this stage, the goal isn’t colour or crunch. Instead, you’re gently cooking the aubergine through until it’s completely tender while simultaneously setting the tapioca coating.
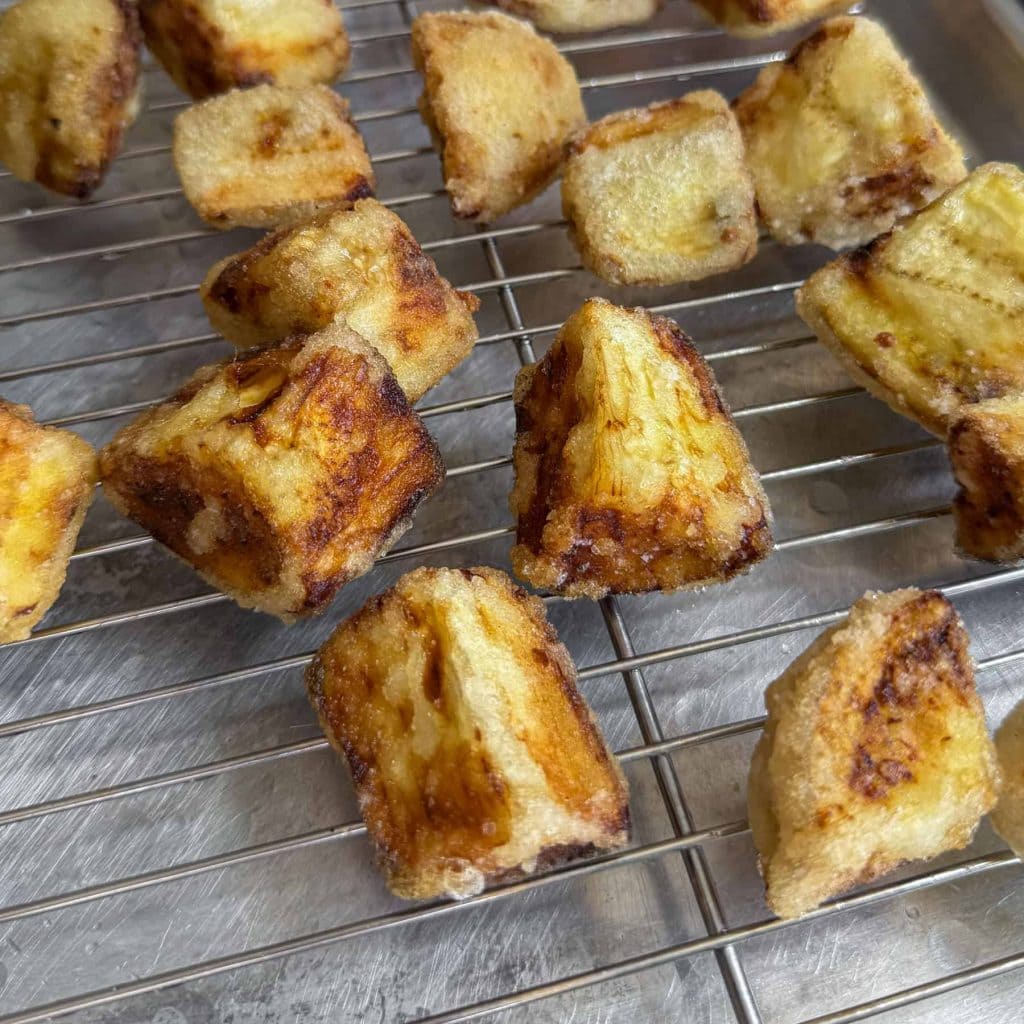
- The second fry takes place at 190°C. The higher temperature rapidly drives off any remaining surface moisture, creating a crisp, golden exterior while preserving the silky, almost creamy interior.
Why Timing Matters
Timing is absolutely crucial when making Crispy Thai Aubergine.
- The enemy of crispness is steam. The moment the aubergine comes out of the fryer, steam begins migrating from the interior to the exterior, gradually softening the coating.
- That’s why I strongly recommend preparing the glaze before the aubergine goes in for its second fry. That way, once the aubergine emerges from the oil at peak crispness, it can be tossed immediately and served straight away.
Will it stay crispy forever? No. But that’s also part of the appeal. As the coating absorbs the glaze, the texture evolves from crisp to sticky, chewy and silky. Rather than becoming soggy, it simply becomes a different kind of delicious.
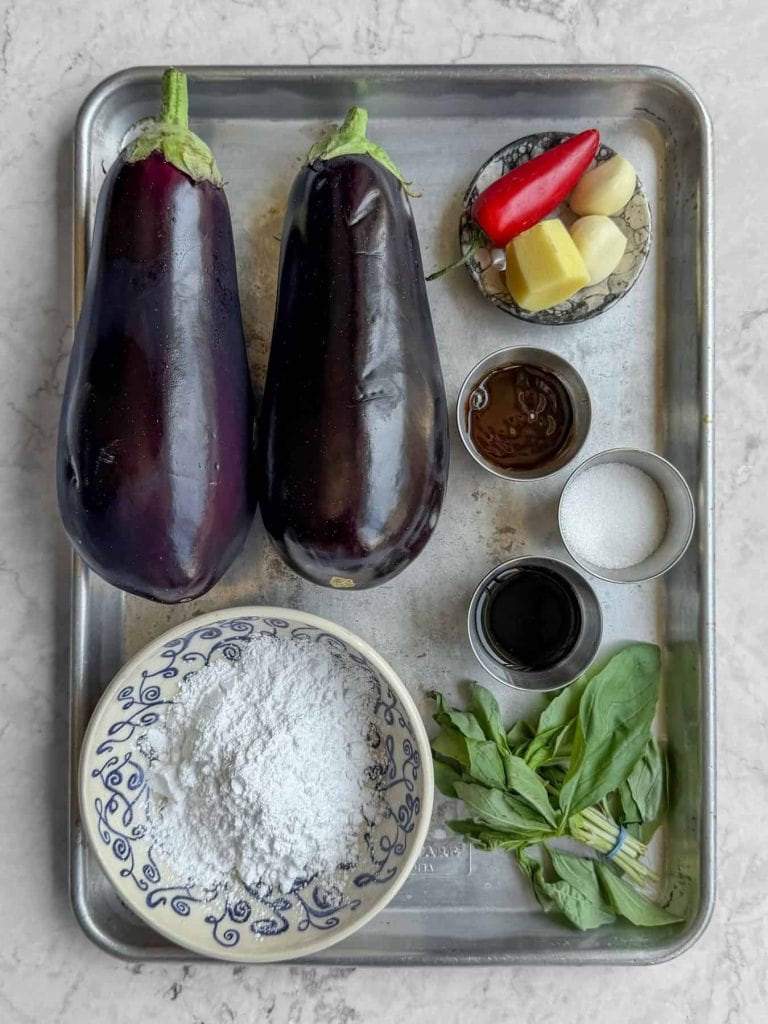
Key Ingredients for Crispy Thai Aubergine
- Aubergines: The star of the show. Look for firm, glossy aubergines that feel heavy for their size. Salting them beforehand helps maximise crispness.
- Tapioca Flour: This creates the light, crisp, almost glassy coating that makes this dish so special.
- Galangal or Ginger: Galangal brings a fresher, sharper flavour, but ginger also works beautifully.
- Oyster Sauce: Adds sweetness, savouriness, umami and the glossy finish that coats the aubergine.
- Fish Sauce: Provides saltiness, depth and complexity.
- Thai Basil: Peppery, fragrant and slightly aniseed-like, Thai basil gives the finished dish its distinctive aroma.
- Red Chilli: Adds freshness, colour and heat.
Ingredient Substitutions for Crispy Thai Aubergine
A few substitutions work well in this Crispy Thai Aubergine recipe:
- Tapioca flour: Substitute potato starch or cornflour.
- Galangal: Substitute fresh ginger.
- Thai basil: Regular basil will work, though the flavour will be different.
- Fish sauce: Use a vegetarian fish sauce alternative.
- Oyster sauce: Vegetarian oyster sauce works very well.
Can I Make Crispy Thai Aubergine in an Air Fryer?
Yes, absolutely. Will it be quite as crispy as the deep-fried version? No. But it will still be incredibly delicious!
- The key to successful air-fried aubergine is ensuring that the pieces don’t touch during cooking. If they do, they’ll stick together and steam rather than crisp.
- A generous coating of oil also helps. Don’t be shy with it.
- The air-fried version won’t remain crisp for quite as long once glazed, but it still develops that wonderful sticky, chewy quality that makes this dish so addictive.
What to Serve with Crispy Thai Aubergine
I think this dish is best served simply. Steamed jasmine rice is essential for soaking up the extra glaze. A fried egg on top also works brilliantly. If you’re serving it as part of a larger spread, try adding stir-fried greens and/or a cucumber salad like my Spicy Smashed Cucumber Salad or Crunchy Sesame Cucumber Salad.
How to Store and Reheat Crispy Thai Aubergine
This is definitely a dish that’s best eaten immediately. That said, leftovers remain incredibly delicious, even though they’ll no longer be crispy. Store them in an airtight container in the fridge for up to 2 days. To reheat, simply warm the aubergine gently in a frying pan, wok or microwave until heated through.
Frequently Asked Questions
Can I use cornflour instead of tapioca flour?
Yes. Cornflour works well, though the final coating will be slightly denser and less crisp than one made with tapioca flour.
What’s the difference between tapioca flour and cornflour?
Both are starches, but they behave differently when fried. Tapioca flour produces a lighter, crispier and slightly glassier coating, while cornflour creates a coating that’s a little denser and more brittle.
Why isn’t my Crispy Thai Aubergine staying crispy?
Unfortunately, that’s simply the nature of fried foods coated in sauce. Double frying helps prolong the crispness, but eventually the glaze will soften the coating. The key is to have the sauce ready and serve immediately.
Can I make Crispy Thai Aubergine ahead of time?
You can prepare the glaze and salt the aubergine ahead of time, but I wouldn’t recommend frying the aubergine until shortly before serving.
Can I make Crispy Thai Aubergine without deep frying?
Yes. I’ve included an air fryer method in the recipe card below.
Crispy Thai Aubergine (Crispy Thai Eggplant)
This Crispy Thai Aubergine is inspired by my favourite dish at one of my favourite London restaurants: the aubergine pad phet at Singburi. It consists of twice-fried aubergine pieces tossed in a glossy, savoury-sweet glaze made with oyster sauce, fish sauce, chilli, garlic, wild ginger and Thai basil.
Twice-frying the aubergine is a brilliant technique. Not only does it create the most incredible texture – crispy on the outside and meltingly soft and juicy in the middle – but it also helps the aubergine retain its crispness once tossed in the glaze. Some softening is inevitable, of course, but trust me when I say it works and tastes absolutely incredible!
- Prep Time: 25 minutes
- Total Time: 1 hour 15 minutes
- Yield: 2–4 (as main and side respectively) 1x
- Category: Side Dish
- Method: Frying
- Cuisine: Thai
Ingredients
- 2 medium/large aubergines
- 1 tsp fine sea salt
- 1 red chilli, thinly sliced
- 20g fresh galangal or ginger, peeled and thinly sliced
- 2 garlic cloves, thinly sliced
- 2 tbsp sugar
- 2 tbsp oyster sauce
- 2 tbsp water
- 2 tsp fish sauce
- 60g tapioca flour
- vegetable oil or any neutral oil, for frying
- large handful fresh Thai basil leaves
Instructions
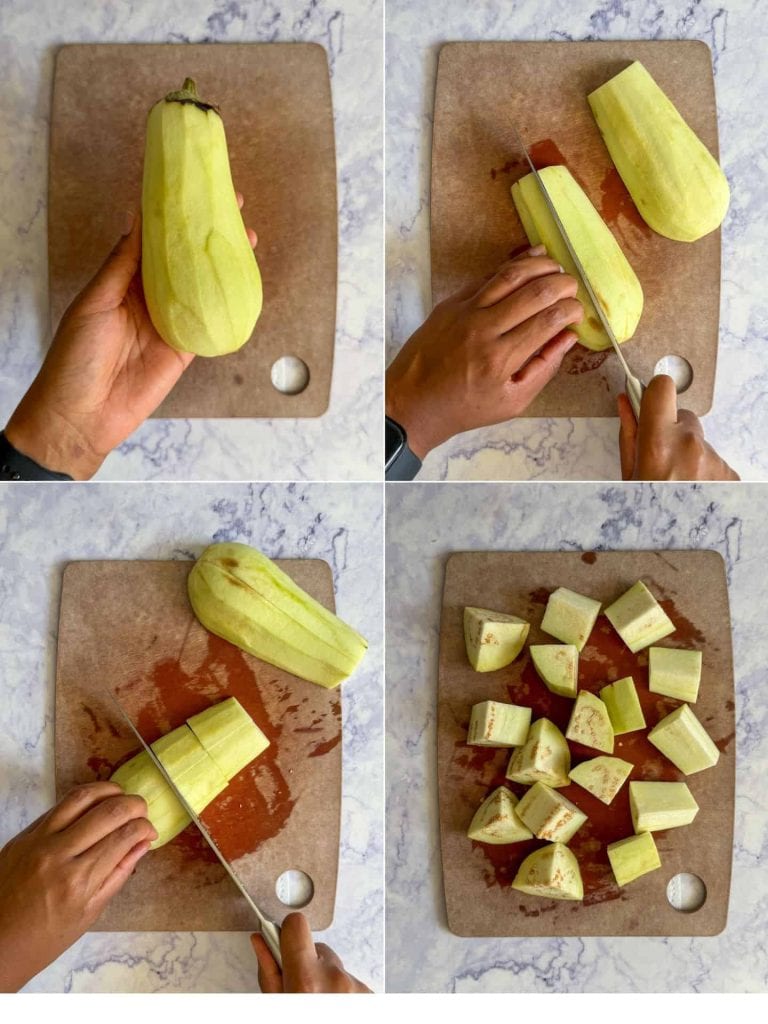
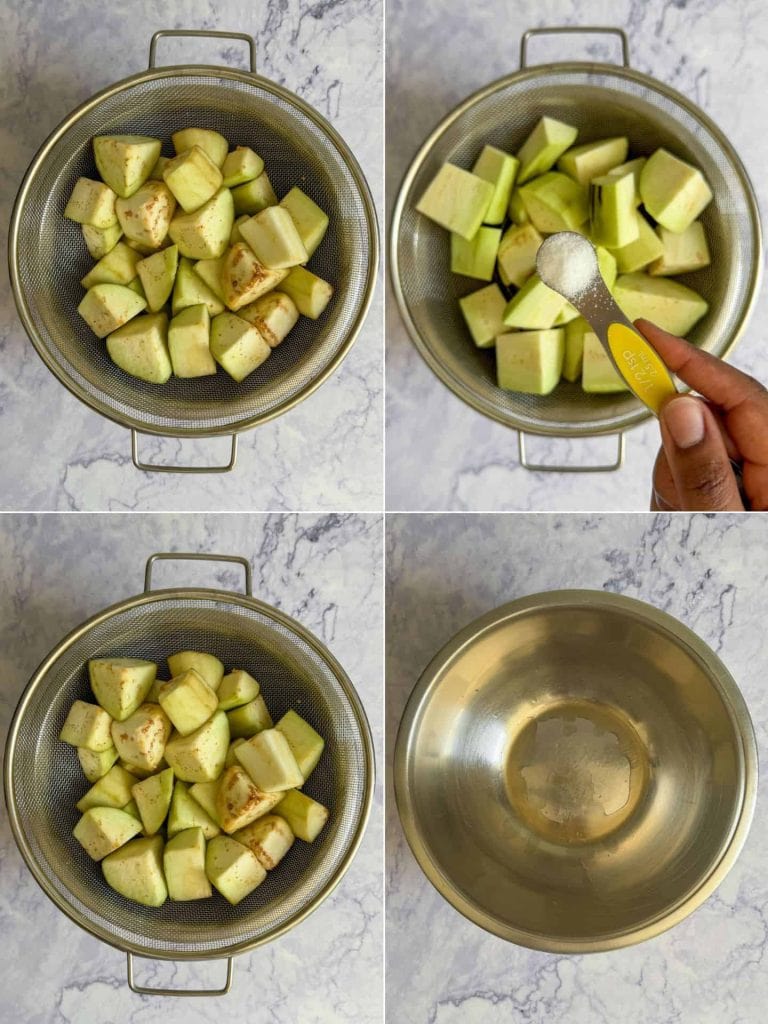
- Peel the aubergines, then cut them into large chunks. I like to halve them lengthways, then halve each piece lengthways again, before cutting each quarter into four chunks.
- Place the aubergine in a colander or large sieve. Sprinkle over the salt, toss to coat and leave to drain for 30 minutes to 1 hour. Don’t skip this step – it’s important for achieving maximum crispiness.
- Meanwhile, prepare the remaining ingredients. Slice the chilli, galangal (or ginger) and garlic and set aside. In a small bowl, combine the sugar, oyster sauce, water and fish sauce and set aside.
- Fill a large, wide sauté pan or deep frying pan halfway with vegetable oil and heat to 160°C. Set a wire rack over a large tray.
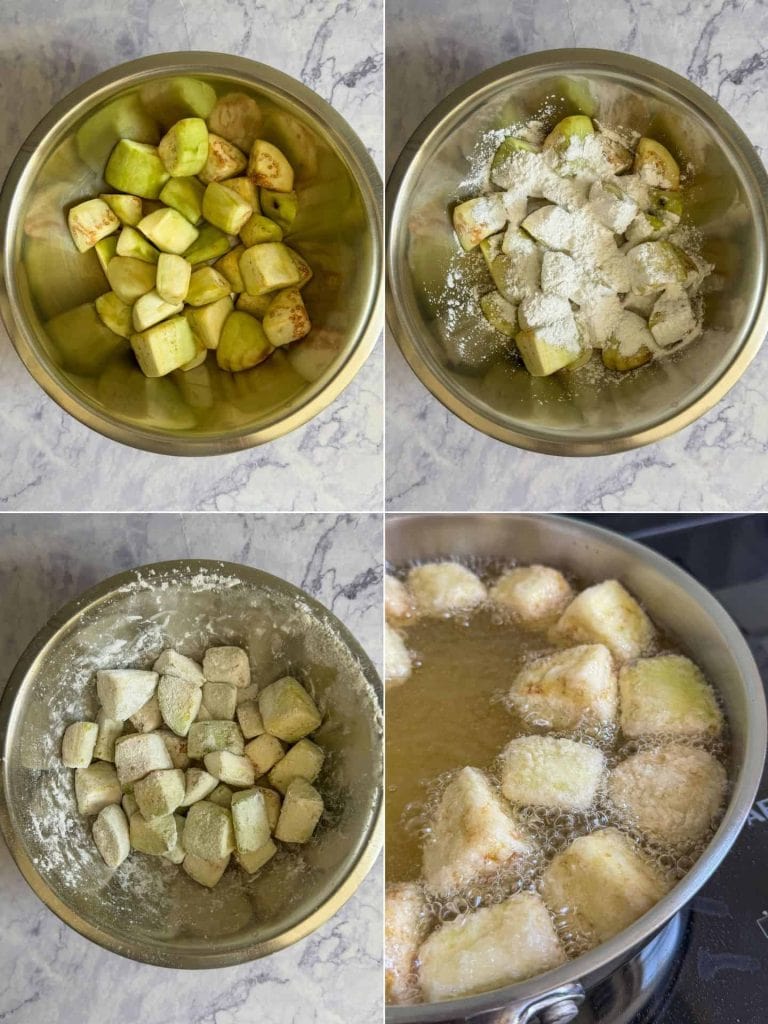
- Transfer the aubergine to a clean tea towel and pat dry to remove any surface moisture. Transfer to a large bowl, add the tapioca flour and toss until evenly coated.
- Working in two batches, carefully lower the aubergine into the oil one piece at a time, shaking off any excess tapioca flour as you go. Fry for 3 to 4 minutes, or until pale, slightly firm on the outside and tender in the middle. Transfer to the wire rack to drain.
- The coating will be quite sticky at the above stage, so avoid moving the aubergine around too much while frying. If pieces have stuck together, gently separate them with two spoons once they’ve been transferred to the rack.
- Repeat with the remaining aubergine.
- Increase the oil temperature to 190°C.
- Meanwhile, heat a splash of vegetable oil in a large wok over high heat. Add the chilli, galangal (or ginger) and garlic and stir-fry for 30 seconds to 1 minute, or until fragrant.
- Add the oyster sauce mixture and cook, stirring almost constantly, for 1 to 2 minutes, or until slightly reduced and glossy. Remove from the heat and set aside.
- Working in batches again, fry the aubergine for a second time for 1 to 2 minutes, or until golden and crisp. Transfer back to the wire rack.
- Return the wok to high heat. Once the glaze is bubbling, add the crispy aubergine and toss to coat. Remove from the heat, add the Thai basil and toss once more until the basil has wilted slightly.
- Transfer to a serving plate and serve immediately, ideally with steamed rice. The aubergine won’t stay crispy forever, but even once it softens, it remains outrageously delicious.
Air Fryer Method
- Whenever I share a deep-fried recipe, the first question I get is: can I air fry it? In this case, yes – but the aubergine won’t stay crispy for quite as long.
- Prepare the aubergine as above, including the salting, drying and coating with tapioca flour.
- Preheat your air fryer to 200°C. Lightly oil the rack or basket.
- You’ll need to work in batches unless you have a dual-drawer air fryer. It’s important that the aubergine pieces don’t touch, otherwise they’ll stick together.
- Arrange the aubergine in a single layer and lightly spray or drizzle with vegetable oil. Air fry for 10 minutes, then turn each piece, spray or drizzle with a little more oil and air fry for a further 5 to 10 minutes, or until golden and crisp.
- Continue with the recipe from the point of making the glaze and tossing the aubergine through it.


2 responses
Presumably you add the fish sauce at step 11?
It’s added in step 3 🙂