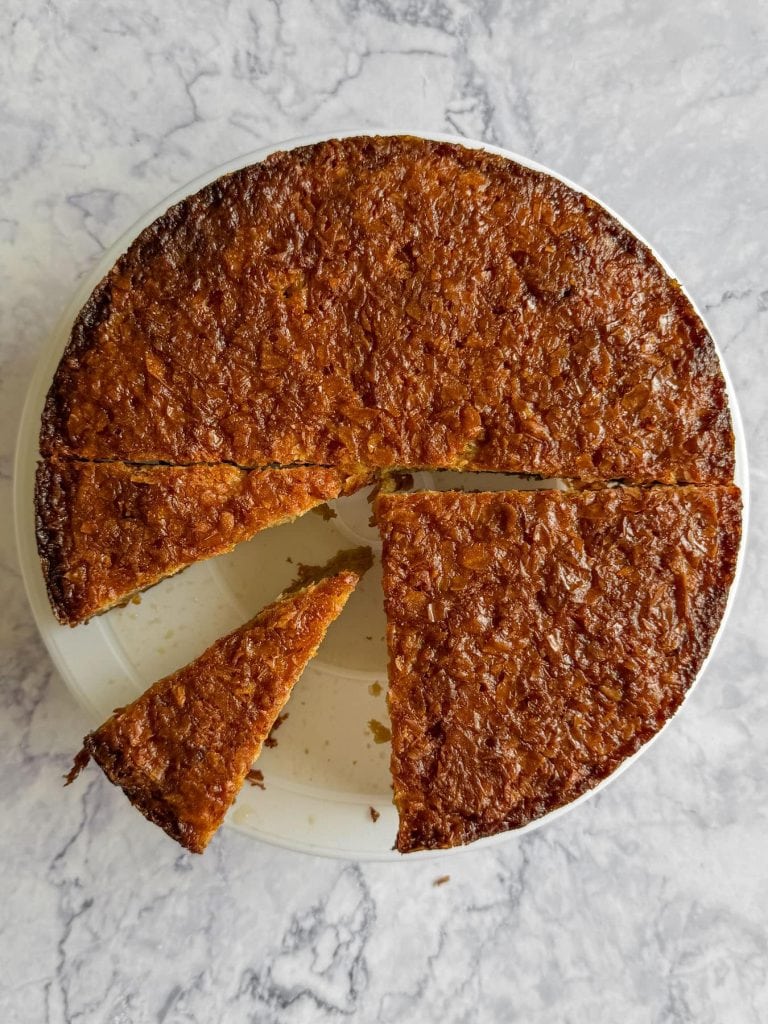
This Earl Grey Portokalopita is my take on portokalopita, a classic Greek orange cake that swaps flour for dried filo. This gives it a texture that’s soft, almost custardy, with lightly crisp edges running through it. Once baked, it’s soaked in a generous orange syrup, which gives it its signature richness.
I’ve added Earl Grey to the syrup here. It’s something I use a lot in desserts — ever since making Molly Baz’s Earl Grey yoghurt cake, it’s quietly worked its way into lots of my baking. There’s something about Earl Grey and citrus, particularly orange, that just works. The bergamot lifts the citrus and adds asubtle layer of depth without taking over.
This Earl Grey Portokalopita keeps everything that makes the original so good, just with that extra layer running through it.
What Is Portokalopita?
Portokalopita (πορτοκαλόπιτα) is a classic Greek orange cake that swaps flour for dried filo. It sits in a category of Greek desserts known as siropiasta — cakes that are soaked in syrup after baking, which is what defines it. This Earl Grey Portokalopita follows that same foundation, with the addition of tea-infused syrup bringing a subtle extra layer.
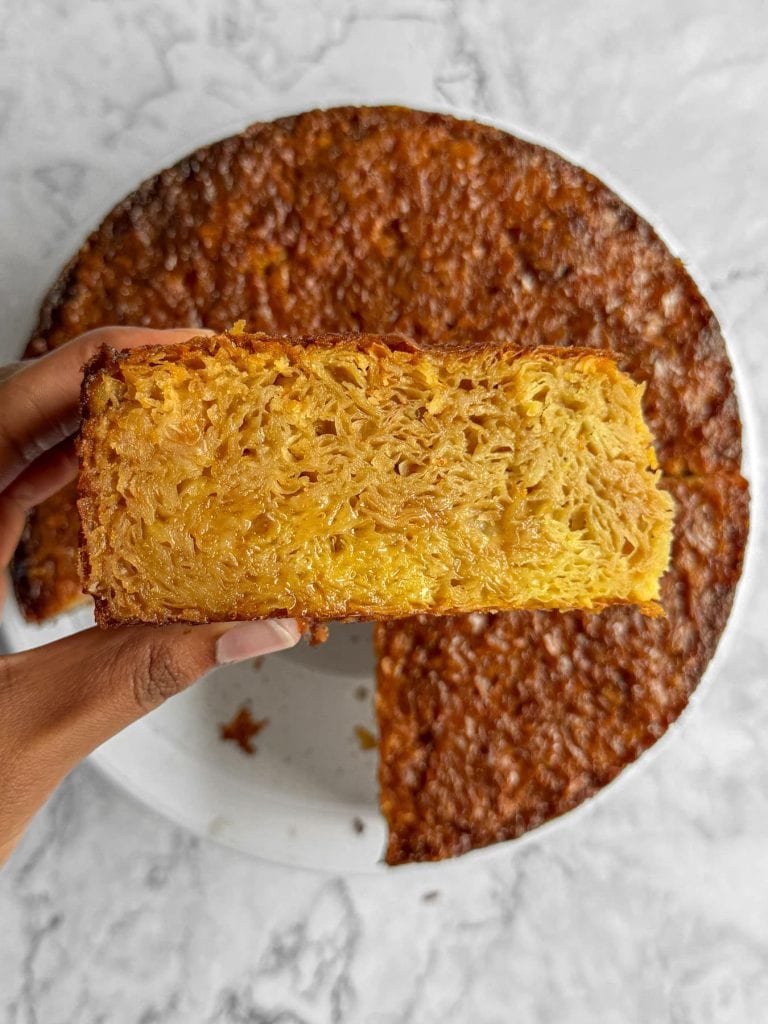
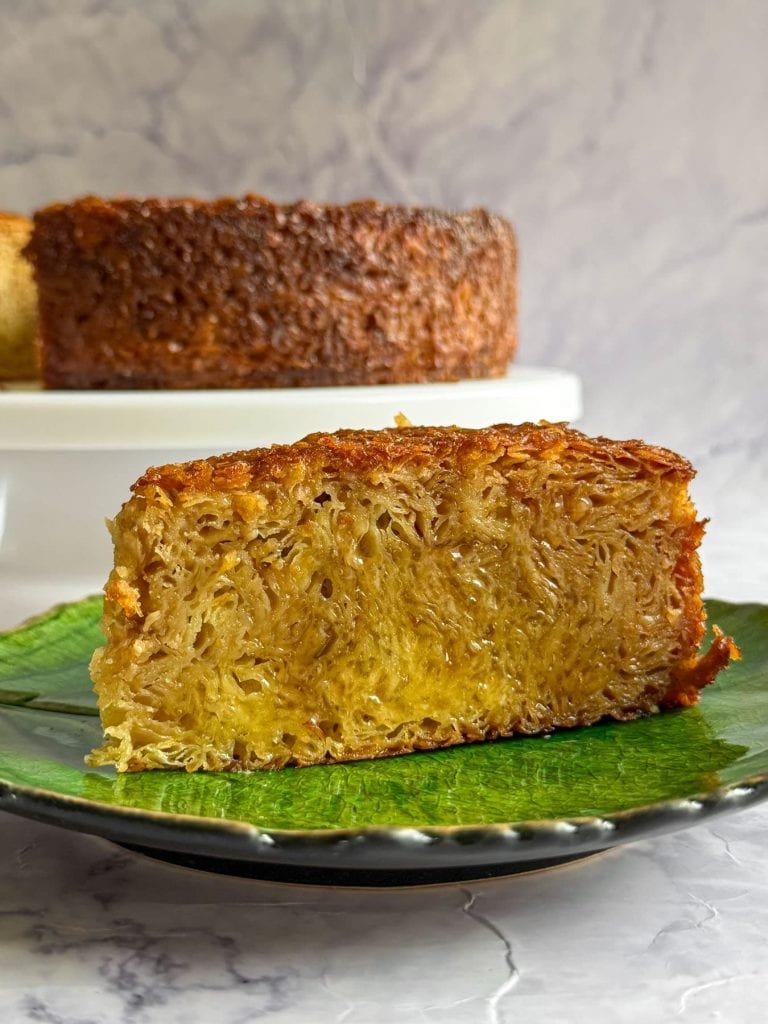
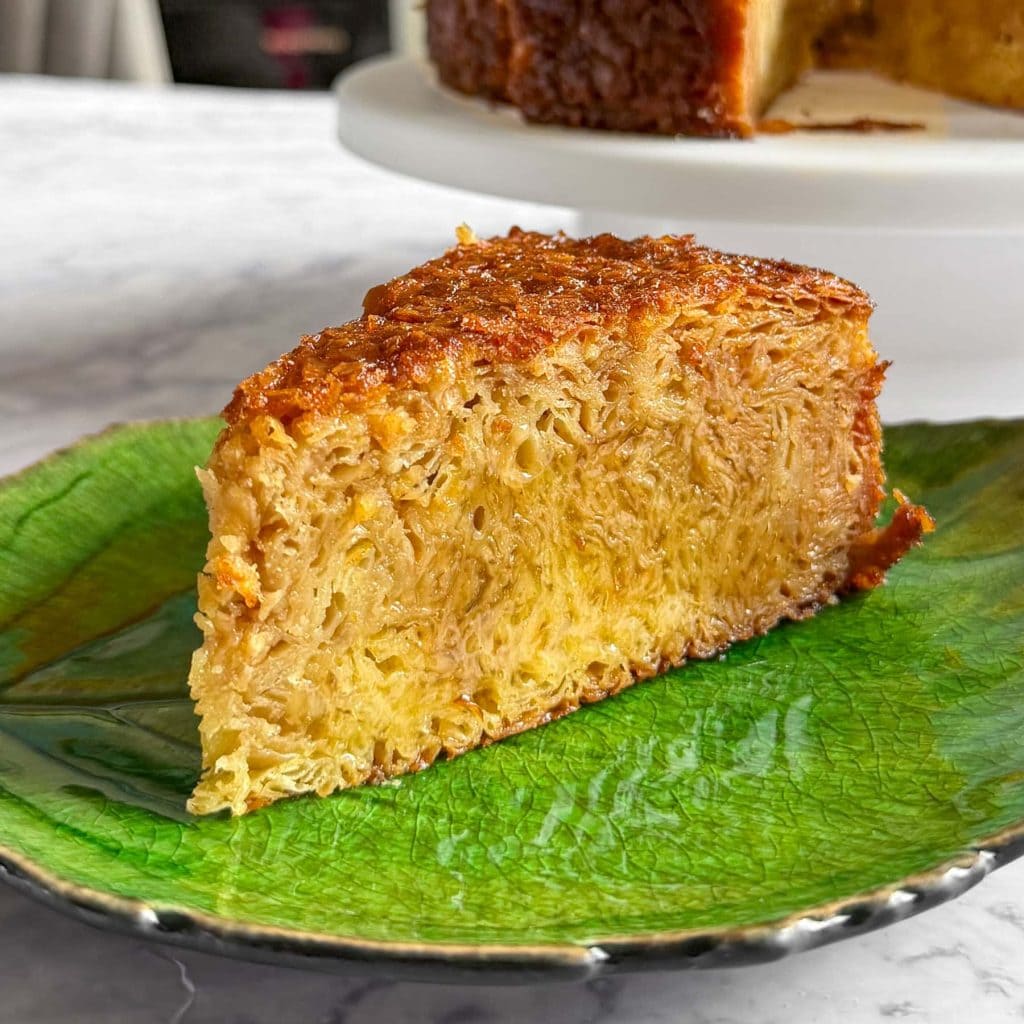
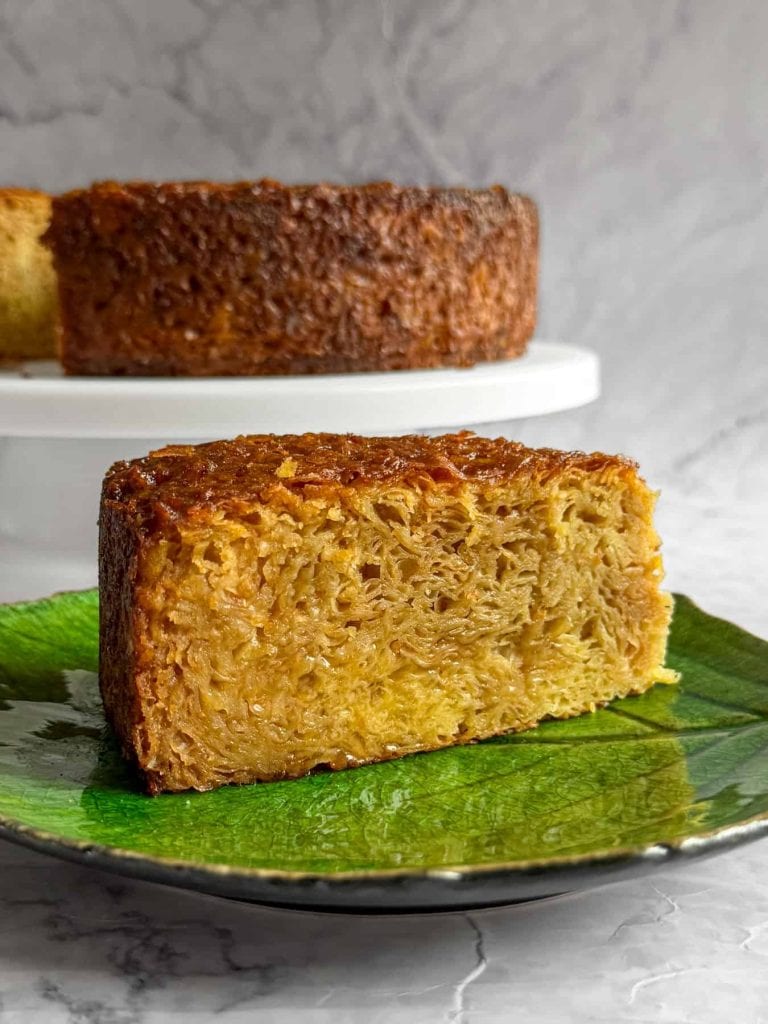
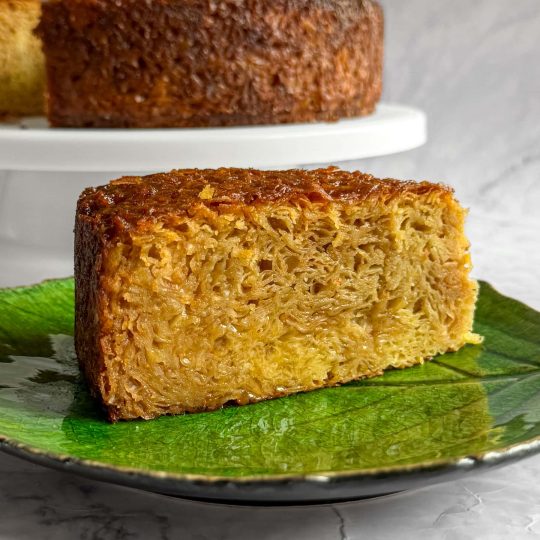
What really sets it apart is the use of dried filo instead of flour. Rather than forming a uniform crumb, the filo absorbs the batter unevenly. Some pieces soften fully, others retain a bit of structure, and the top catches in the oven. The result is a cake with contrast — soft, syrupy, and slightly structured all at once. It’s that variation in texture that makes it so good, and it’s also the easiest thing to get wrong.
Getting The Texture Right In Earl Grey Portokalopita
A lot of portokalopita recipes lean too far towards soft and end up slightly mushy in the middle. That usually comes down to two things: under-dried filo and too much batter relative to pastry.
Here, the aim is to keep definition. You want to see strands of filo running through the cake, not have them disappear completely. That’s what gives it that slightly layered, almost shredded interior rather than something dense and mushy.
Breaking the filo into uneven shards helps with this too. Smaller pieces soften more, larger ones hold their shape, and you end up with a better mix overall.
Why Drying The Filo Properly Matters In Earl Grey Portokalopita
Drying the filo properly is the most important step in this Earl Grey Portokalopita recipe. If there’s any residual moisture, the pastry won’t absorb the batter evenly. Instead, it compresses into clumps, which bake into dense patches. That’s where you get that heavy, slightly mushy texture some versions have.
When it’s fully dried, the filo becomes brittle and almost feathery. Once folded into the batter, it softens gradually and evenly, which is what gives you that balance of soft and structured.
The oven method is the most reliable. You’re not trying to colour it — just drive off moisture. It should feel completely dry and snap easily once cooled.
Earl Grey Syrup: Why Temperature Matters
With Earl Grey Portokalopita, the syrup isn’t just a finishing touch — it’s integral to the final texture.
- The cake needs to be hot when the syrup goes on, straight from the oven. The syrup, on the other hand, must be fully cooled. That temperature contrast allows it to absorb slowly and evenly.
- If you pour hot syrup over a hot cake, it overwhelms the structure. Everything softens too quickly and you lose the definition you’ve built up with the filo. If both are cold, the syrup won’t penetrate properly.
- Adding it gradually is just as important. Let each ladle absorb before adding the next — that’s what gives you an even soak from top to bottom.
Why Earl Grey Portokalopita Needs To Rest Overnight
This is where the cake properly settles. Straight after soaking, it’s good, but the syrup hasn’t fully distributed and the texture is still a bit uneven. By the next day, everything has evened out. The filo has softened fully, the syrup has absorbed throughout, and the flavour is more cohesive.
It also slices much more cleanly. If you cut it too early, it can feel loose and slightly unstable. In practice, this makes it ideal for dinner parties. You make it the day before, and it’s better for it.
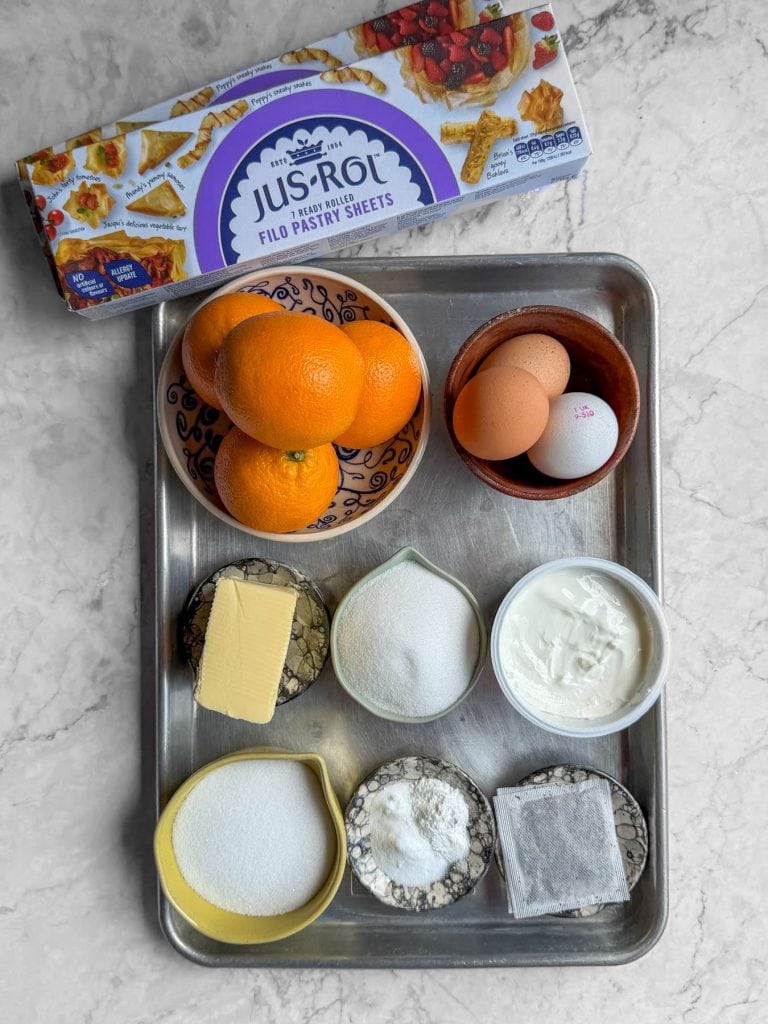
Ingredients You’ll Need To Make Earl Grey Portokalopita
- Filo pastry — dried until crisp so it can absorb the batter properly
- Eggs — for structure and richness
- Caster sugar — sweetness for both batter and syrup
- Greek yoghurt — adds tang and keeps the crumb soft
- Oranges — zest and juice for a strong, fresh citrus base
- Salted butter (or vegetable oil) — butter for richness, oil for a slightly lighter finish
- Bicarbonate of soda — reacts with the yoghurt to give lift
- Baking powder — extra insurance for structure
- Earl Grey tea bags — infuses the syrup with bergamot
How To Make Earl Grey Portokalopita
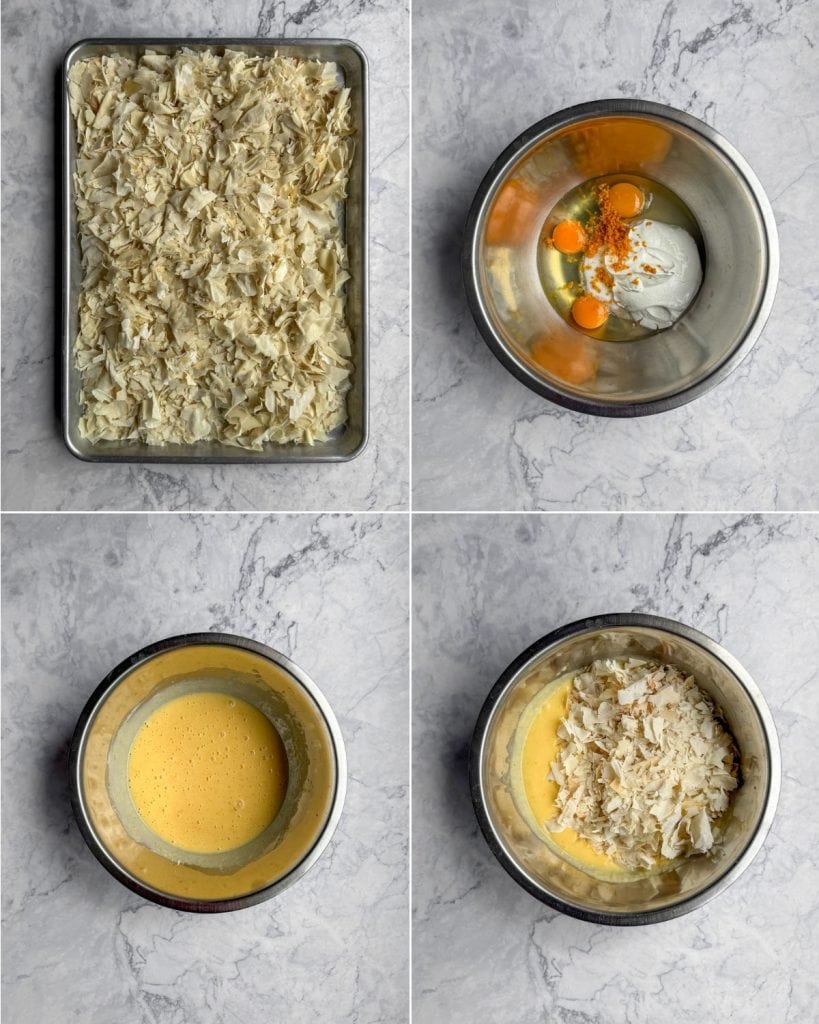
- Start with the syrup so it has time to cool completely. Combine the orange juice, sugar and water in a saucepan and bring to the boil over a medium-high heat, stirring to dissolve the sugar. Add the Earl Grey tea bags, reduce the heat and simmer briefly to infuse, then remove from the heat, discard the tea bags and set aside to cool.
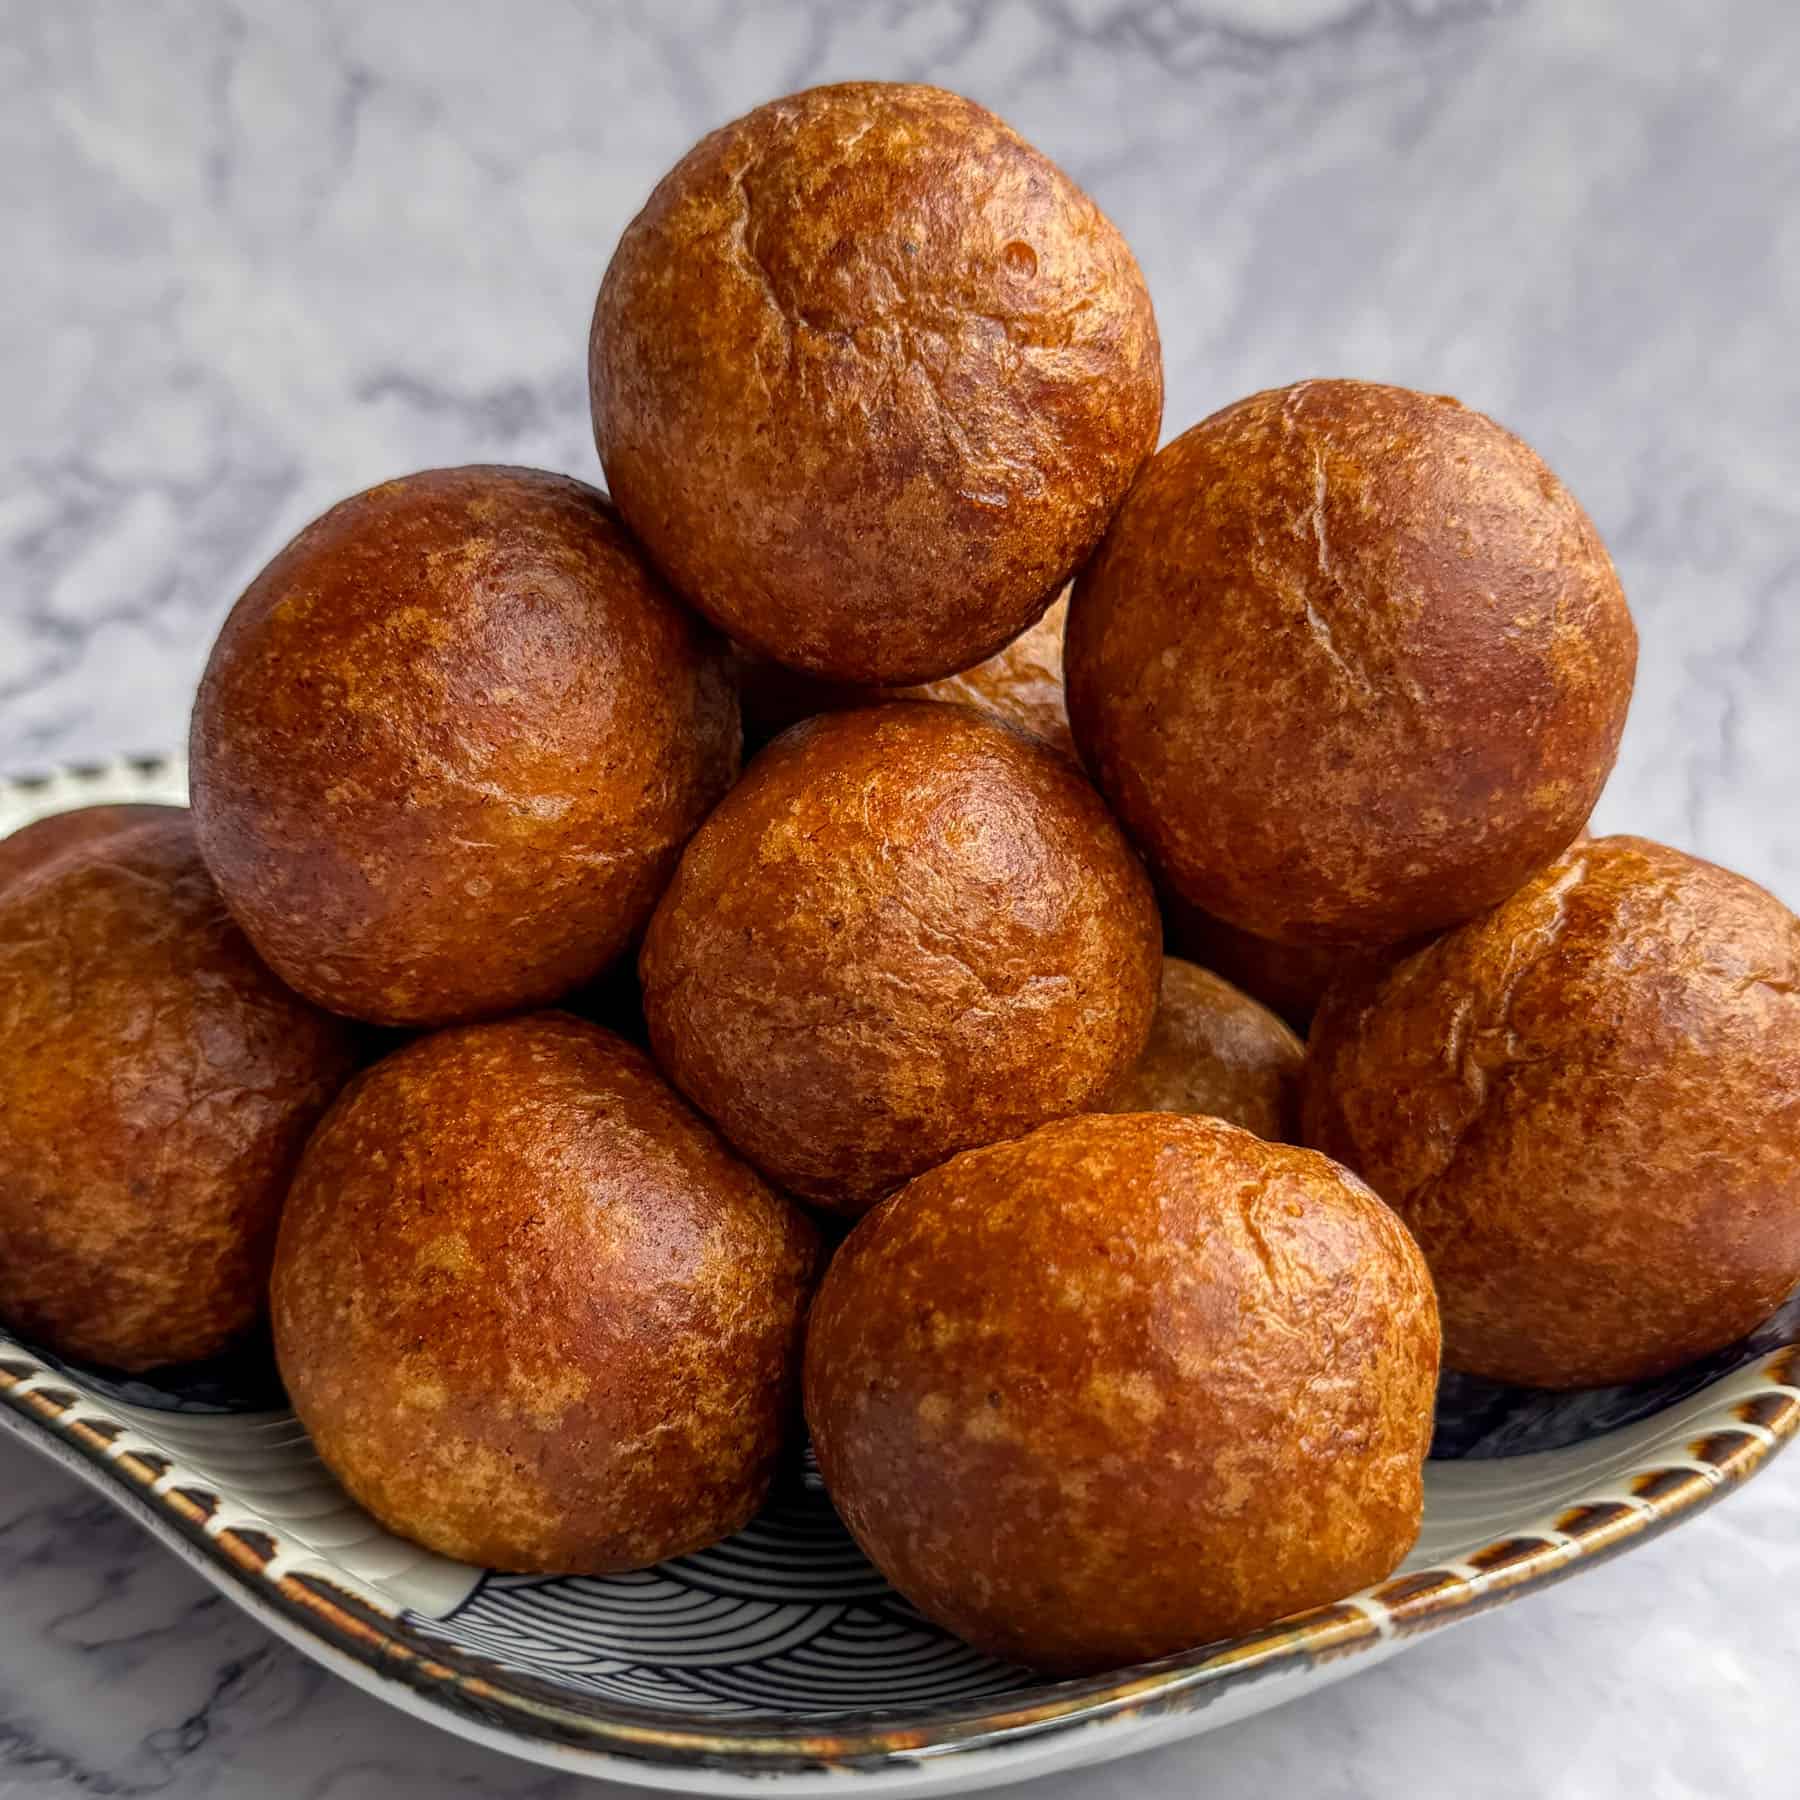
- Dry the filo by scrunching it loosely and spreading it over a baking tray. Bake at a low temperature until crisp but not coloured, or leave it out at room temperature until fully dried. Once cool, break it into small, uneven pieces.
- Make the batter by whisking together the eggs, sugar, yoghurt, orange zest and juice until smooth. Add the melted butter, bicarbonate of soda and baking powder, then whisk again until fully combined.
- Fold in the dried filo gradually, making sure it’s evenly distributed. Adding it in stages helps prevent clumping and ensures the batter coats everything properly.
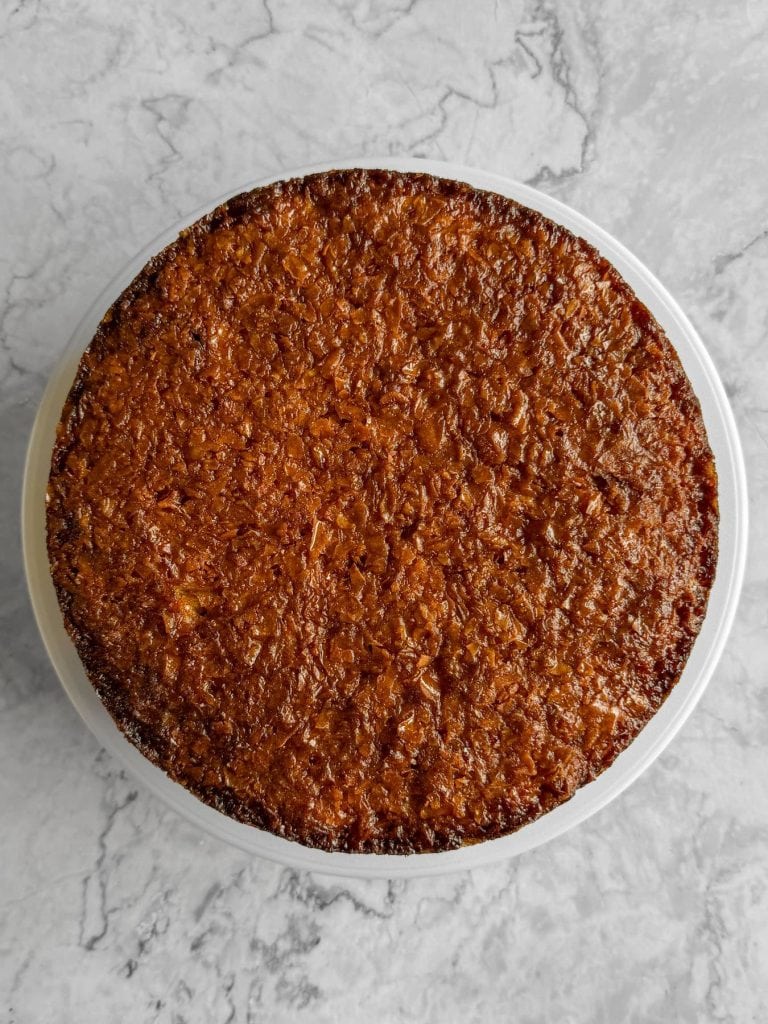
- Transfer the mixture to a lined tin and bake until deeply golden and set with no wobble in the centre.
- Pierce the cake all over and begin adding the cooled syrup a ladle at a time, letting each addition absorb before adding the next.
- Leave to cool completely, then refrigerate overnight before removing from the tin, slicing and serving.
How To Serve Earl Grey Portokalopita
Earl Grey Portokalopita is best served cold or at room temperature. It’s not a cake you serve warm — the texture improves as it cools and settles.
It works well with something creamy alongside. Vanilla ice cream adds contrast, while Greek yoghurt keeps things a bit sharper and less sweet.
Because it improves as it sits, it’s also a very good make-ahead dessert — perfect for dinner parties. By the next day, the texture and flavour are exactly where they should be.
FAQs
How is Earl Grey Portokalopita different from other orange cakes?
It uses dried filo instead of flour and is soaked in syrup after baking, which gives it a completely different texture and a more intense flavour.
Can you use oil instead of butter?
Yes. Oil gives a slightly lighter, cleaner flavour and keeps the cake moist for longer, while butter adds richness.
Can you make it ahead of time?
Yes — and it’s better that way. The overnight rest allows the syrup to fully absorb and the texture to settle.
Can you freeze it?
It’s not recommended. The texture becomes overly soft once defrosted.
How do you store it?
Keep it in the fridge in an airtight container for up to 5 days.
More Desserts To Try
If you’ve enjoyed this Earl Grey Portokalopita, here are a few other desserts in a similar vein — syrup-soaked, fruit-led, or quietly spiced, all with that same focus on flavour and texture.
- Ginger And Cardamom Baklava — crisp layers of filo soaked in a warmly spiced syrup, with deep notes of ginger and cardamom
- Coconut Mochi Cake — soft, chewy and rich with coconut, with that signature bouncy mochi texture
- Strawberry And Elderflower Galette — a simple, free-form tart with juicy strawberries and a light floral lift from elderflower
- Maple Cinnamon Baked Peaches — tender roasted peaches finished with maple and cinnamon, simple but deeply flavourful
Earl Grey Portokalopita (Greek Orange Filo Cake)
Portokalopita is a classic Greek orange cake that swaps flour for dried filo, giving it a texture that’s soft, almost custardy, with lightly crisp edges running through it. Once baked, it’s soaked in a generous orange syrup, which gives it its signature richness. I’ve added Earl Grey to the syrup, which lifts the citrus with a gentle bergamot note and rounds everything out beautifully.
- Prep Time: 25 minutes
- Total Time: 1 hou5 15 minutes, plus overnight resting
- Yield: 12 1x
Ingredients
For the syrup:
- 2 oranges, juiced
- 300g caster sugar
- 250ml water
- 4 Earl Grey tea bags
For the cake
- 2 x 270g packs filo pastry
- 3 large eggs
- 175g caster sugar
- 200g full-fat Greek yoghurt
- 2 oranges, zest and juice
- 150g salted butter, melted (or 120ml vegetable oil)
- 1½ tsp bicarbonate of soda
- 1 tsp baking powder
Instructions
- Heat your oven to 130°C / 110°C fan.
- Combine the orange juice, sugar and water in a saucepan and bring to the boil over a medium-high heat, stirring to dissolve the sugar. Add the tea bags, reduce the heat to medium and simmer for 4 minutes. Remove from the heat, discard the tea bags and leave the syrup to cool completely.
- Scrunch the filo sheets loosely and spread them out over a large baking tray in a single-ish layer. Bake for 10 minutes, turning once halfway through, or until dried and crisp but not coloured. Transfer to a rack to cool, then repeat with the remaining filo. Alternatively, you can leave the sheets out at room temperature for a few hours until fully dried.
- Once cool, break the filo into small pieces with your hands – they can be sharp, so be careful!
- Turn your oven up to 180°C / 160°C fan. Grease and line a 23cm springform tin, or use a 20cm square tin if you’d prefer to serve it straight from the dish.
- In a large bowl, whisk together the eggs, sugar, yoghurt, orange zest and juice until smooth. Add the melted butter, bicarbonate of soda and baking powder, then whisk again until fully combined.
- Add the dried filo in stages, folding it in gently with a spatula so it doesn’t clump. Continue until evenly incorporated.
- Pour the mixture into the prepared tin and bake for 35 to 45 minutes, or until deeply golden and set with no wobble in the centre.
- As soon as it comes out of the oven, pierce it all over with a skewer or toothpick, then gradually ladle over the cooled syrup, letting each addition absorb before adding the next, until it’s all used.
- Leave to cool to room temperature, then refrigerate in the tin overnight. The next day, remove from the tin, slice and serve.