If you’ve ever felt intimidated by baking bread, No-Knead Focaccia is where you begin. This recipe strips bread-making down to its essentials. No mixer, no kneading, and no fuss. Just a gloriously soft, pillowy crumb and a golden, crisp crust. With the help of time and olive oil, this bread almost makes itself.
The hands-off nature of this method allows you to go about your day while the dough slowly transforms. The result? An irresistible bake that’s perfect with soups, as a sandwich base, or simply on its own. No-Knead Focaccia proves that great bread doesn’t need complicated steps. Just good ingredients and patience. And once you try it, you’ll keep coming back for more.
Ingredient Breakdown
- Strong white bread flour: The higher protein content gives the focaccia structure and a chewy interior.
- Fast action dried yeast: Helps the dough rise beautifully without needing activation in warm water.
- Warm water: Activates the yeast and hydrates the flour to form the dough.
- Fine sea salt: Enhances the natural flavours of the flour and balances the sweetness of the dough.
- White granulated sugar: Feeds the yeast and adds a subtle depth of flavour.
- Extra-virgin olive oil: Adds richness, moisture and that signature focaccia flavour.
- Butter or greaseproof paper: Prevents sticking and makes removing the baked bread easier.
- Garlic cloves: Add fragrant intensity to the topping.
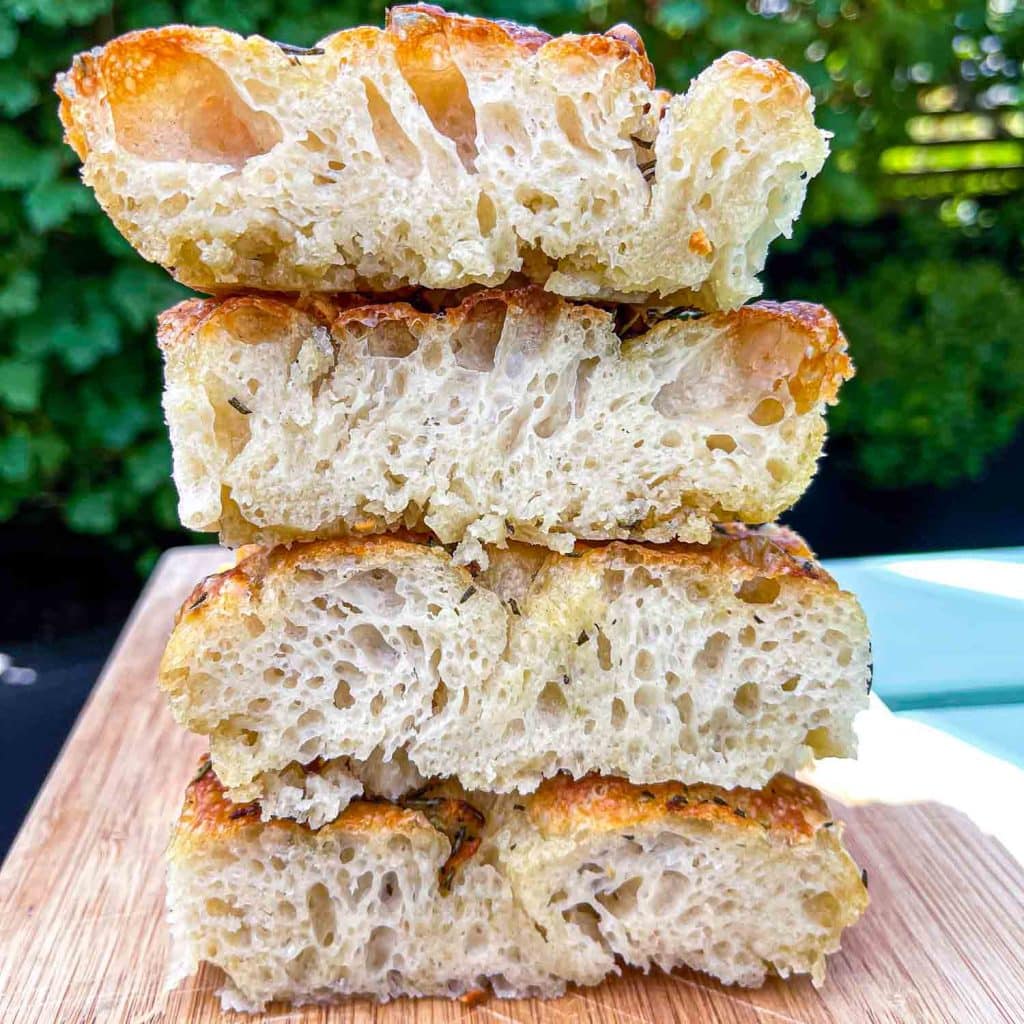
- Fresh rosemary: Brings herbaceous freshness that pairs perfectly with olive oil and garlic.
Why No-Knead Focaccia Works
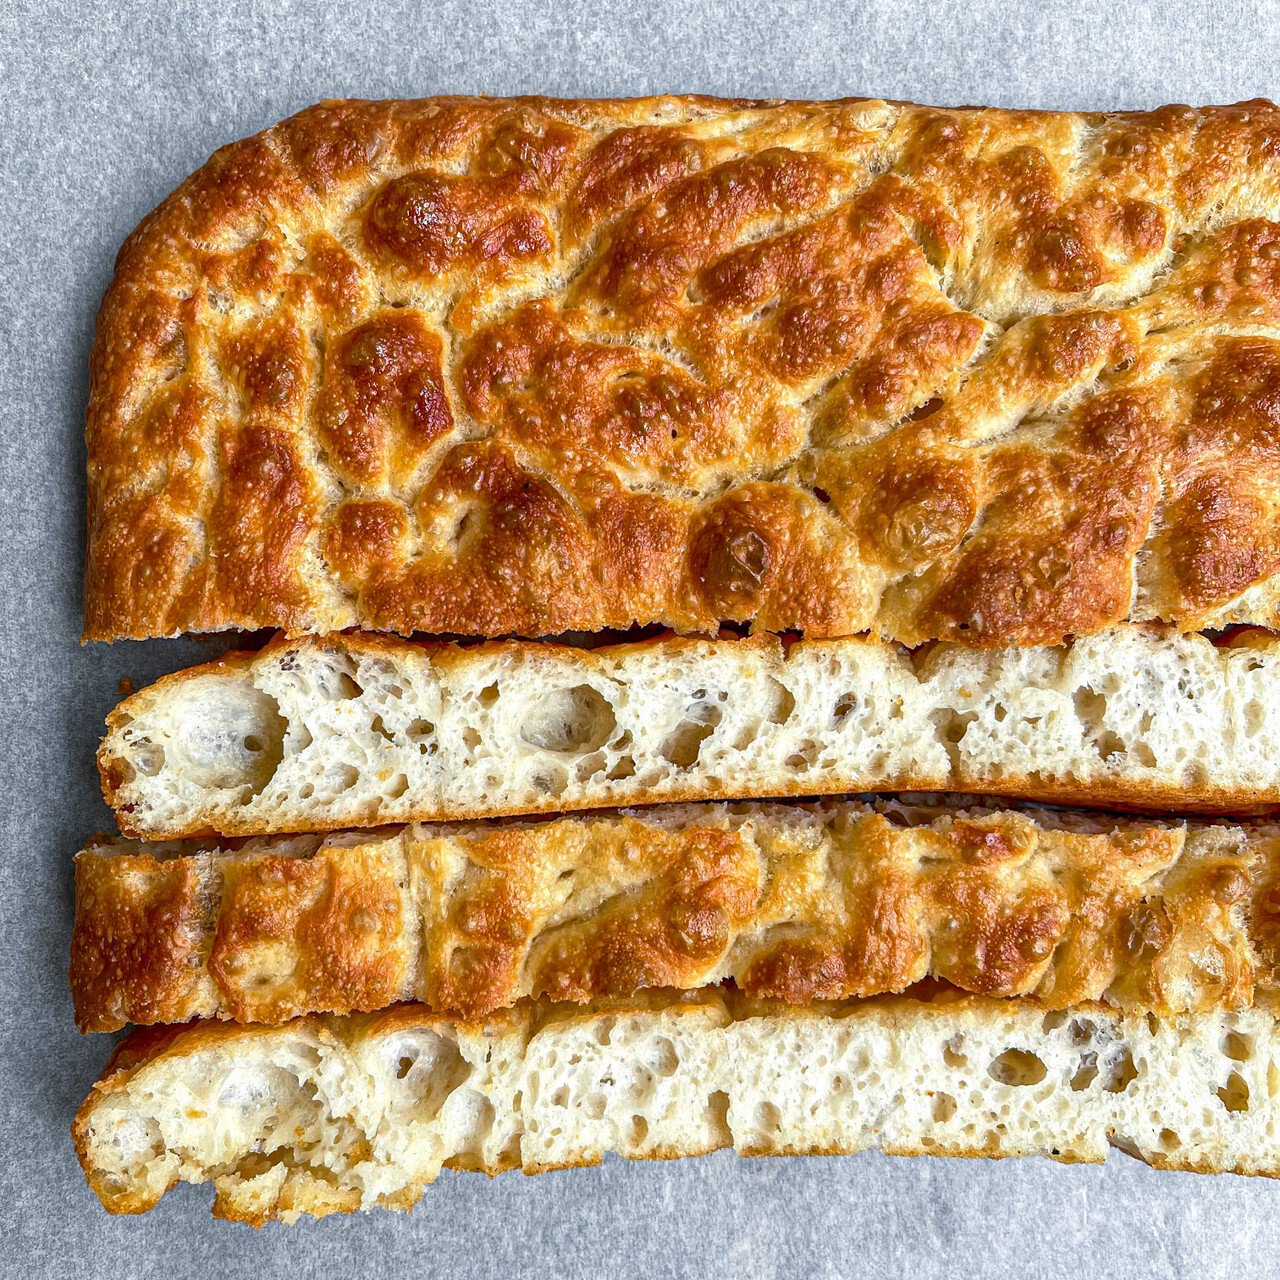
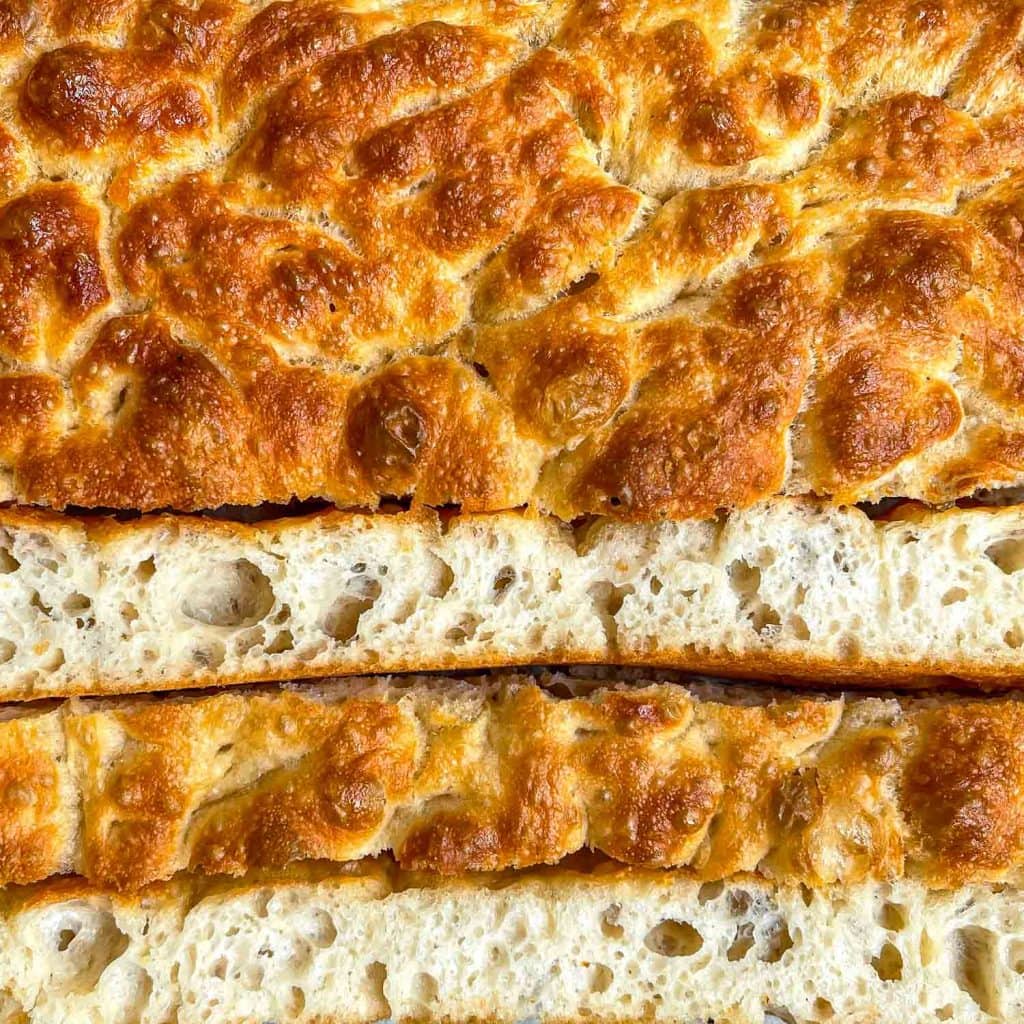
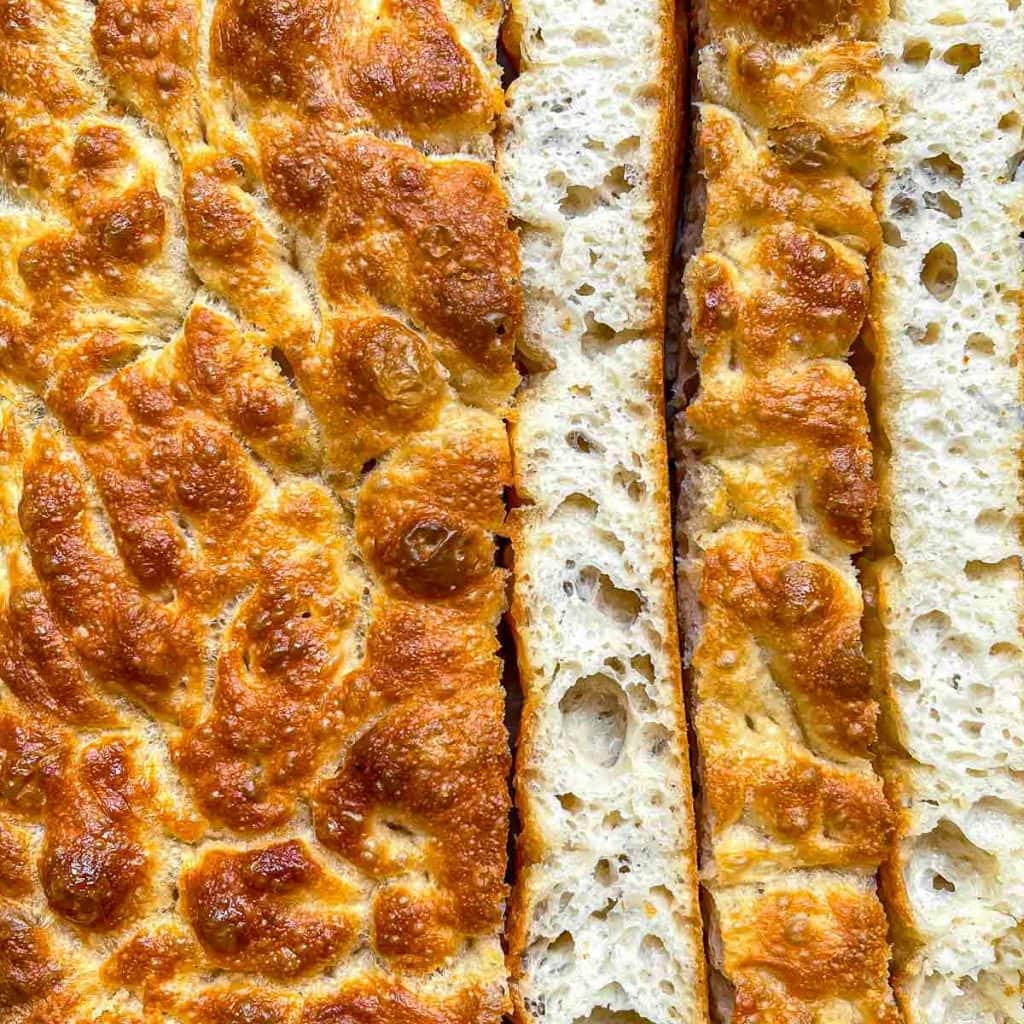
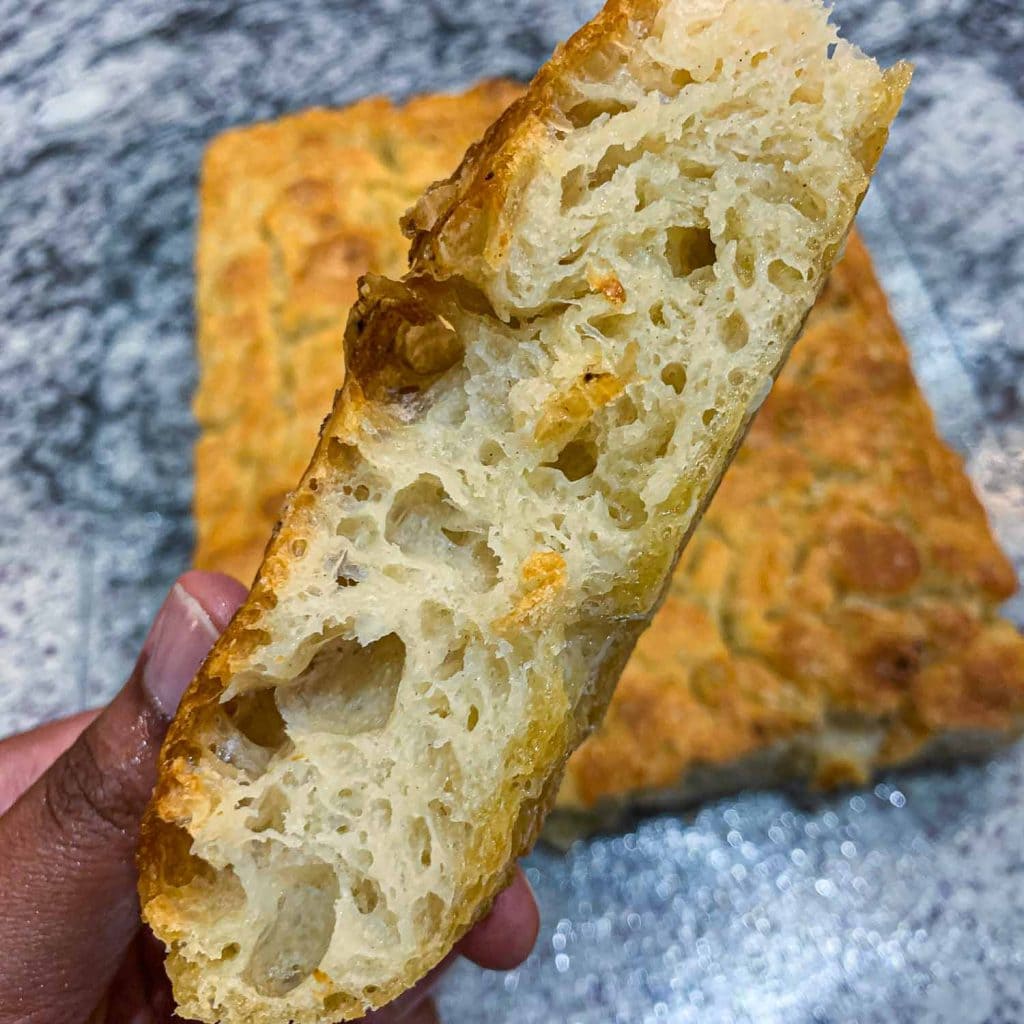
The science behind No-Knead Focaccia lies in time and hydration. This dough is deliberately wet. The higher water content creates a moist crumb and an airy interior. By skipping the kneading, you allow the gluten to form slowly on its own. As the dough rests, the flour fully absorbs the water, and fermentation begins.
This slow process strengthens the structure naturally. What you sacrifice in hands-on time, you gain in flavour and texture. The long resting time also encourages the yeast to develop a slight tang and complexity in the dough. Combine this with a generous glug of olive oil and you’ve got a bread with a crispy edge and fluffy middle that practically melts in your mouth.
Choosing the Right Tin for Your Focaccia
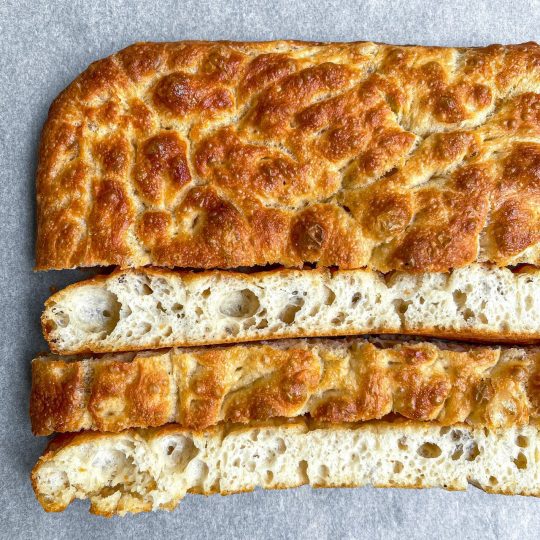
Your choice of tin affects the final bake. A metal roasting tin gives the best crust because it conducts heat evenly and efficiently. If you’re using glass or ceramic, you’ll want to keep an eye on the bake time and make sure you line the dish well with greaseproof paper or butter.
Despite the generous oil, focaccia tends to stick if the pan isn’t prepared properly. The shape of the tin also affects the thickness of the bread. A smaller tin yields a taller, more dramatic focaccia, while a larger one gives a flatter, crispier finish. No matter which route you take, ensure your tin allows the dough room to expand and bubble during its final rise.
How to Nail the Perfect Dough Texture
Don’t be tempted to add extra flour. This dough should feel sticky, almost loose, and wetter than you’re used to. That’s part of the magic. It may look unruly at first, but this high hydration is essential for creating that beautiful open crumb structure.
When it comes time to transfer it to the baking dish, use oiled hands to prevent sticking and help shape it. The fork-folding method used to deflate the dough creates subtle structure while preserving the airy interior. It may seem informal, but it’s very effective. Once you get used to working with this kind of dough, you’ll realise how forgiving and rewarding it is.
Dimpling and Topping: Not Just for Looks
The dimpling stage of No-Knead Focaccia is more than just fun. Pressing your fingers deep into the dough right before baking helps it bake more evenly. It stops large air bubbles from forming on the surface and gives that characteristic look. These little wells also hold the flavoured oil, helping it soak into the dough as it bakes. This adds both texture and flavour.
Topping with garlic and rosemary is a classic move that never disappoints. But don’t stop there. Sun-dried tomatoes, olives, caramelised onions or even thinly sliced potatoes can take your focaccia in new directions. The base dough is a blank canvas ready for your creativity.
Serving Suggestions
Fresh out of the oven, No-Knead Focaccia needs little else. Serve it warm, cut into squares, with a bowl of good olive oil and balsamic vinegar. It’s also brilliant alongside soups or stews, especially tomato-based or creamy lentil varieties.
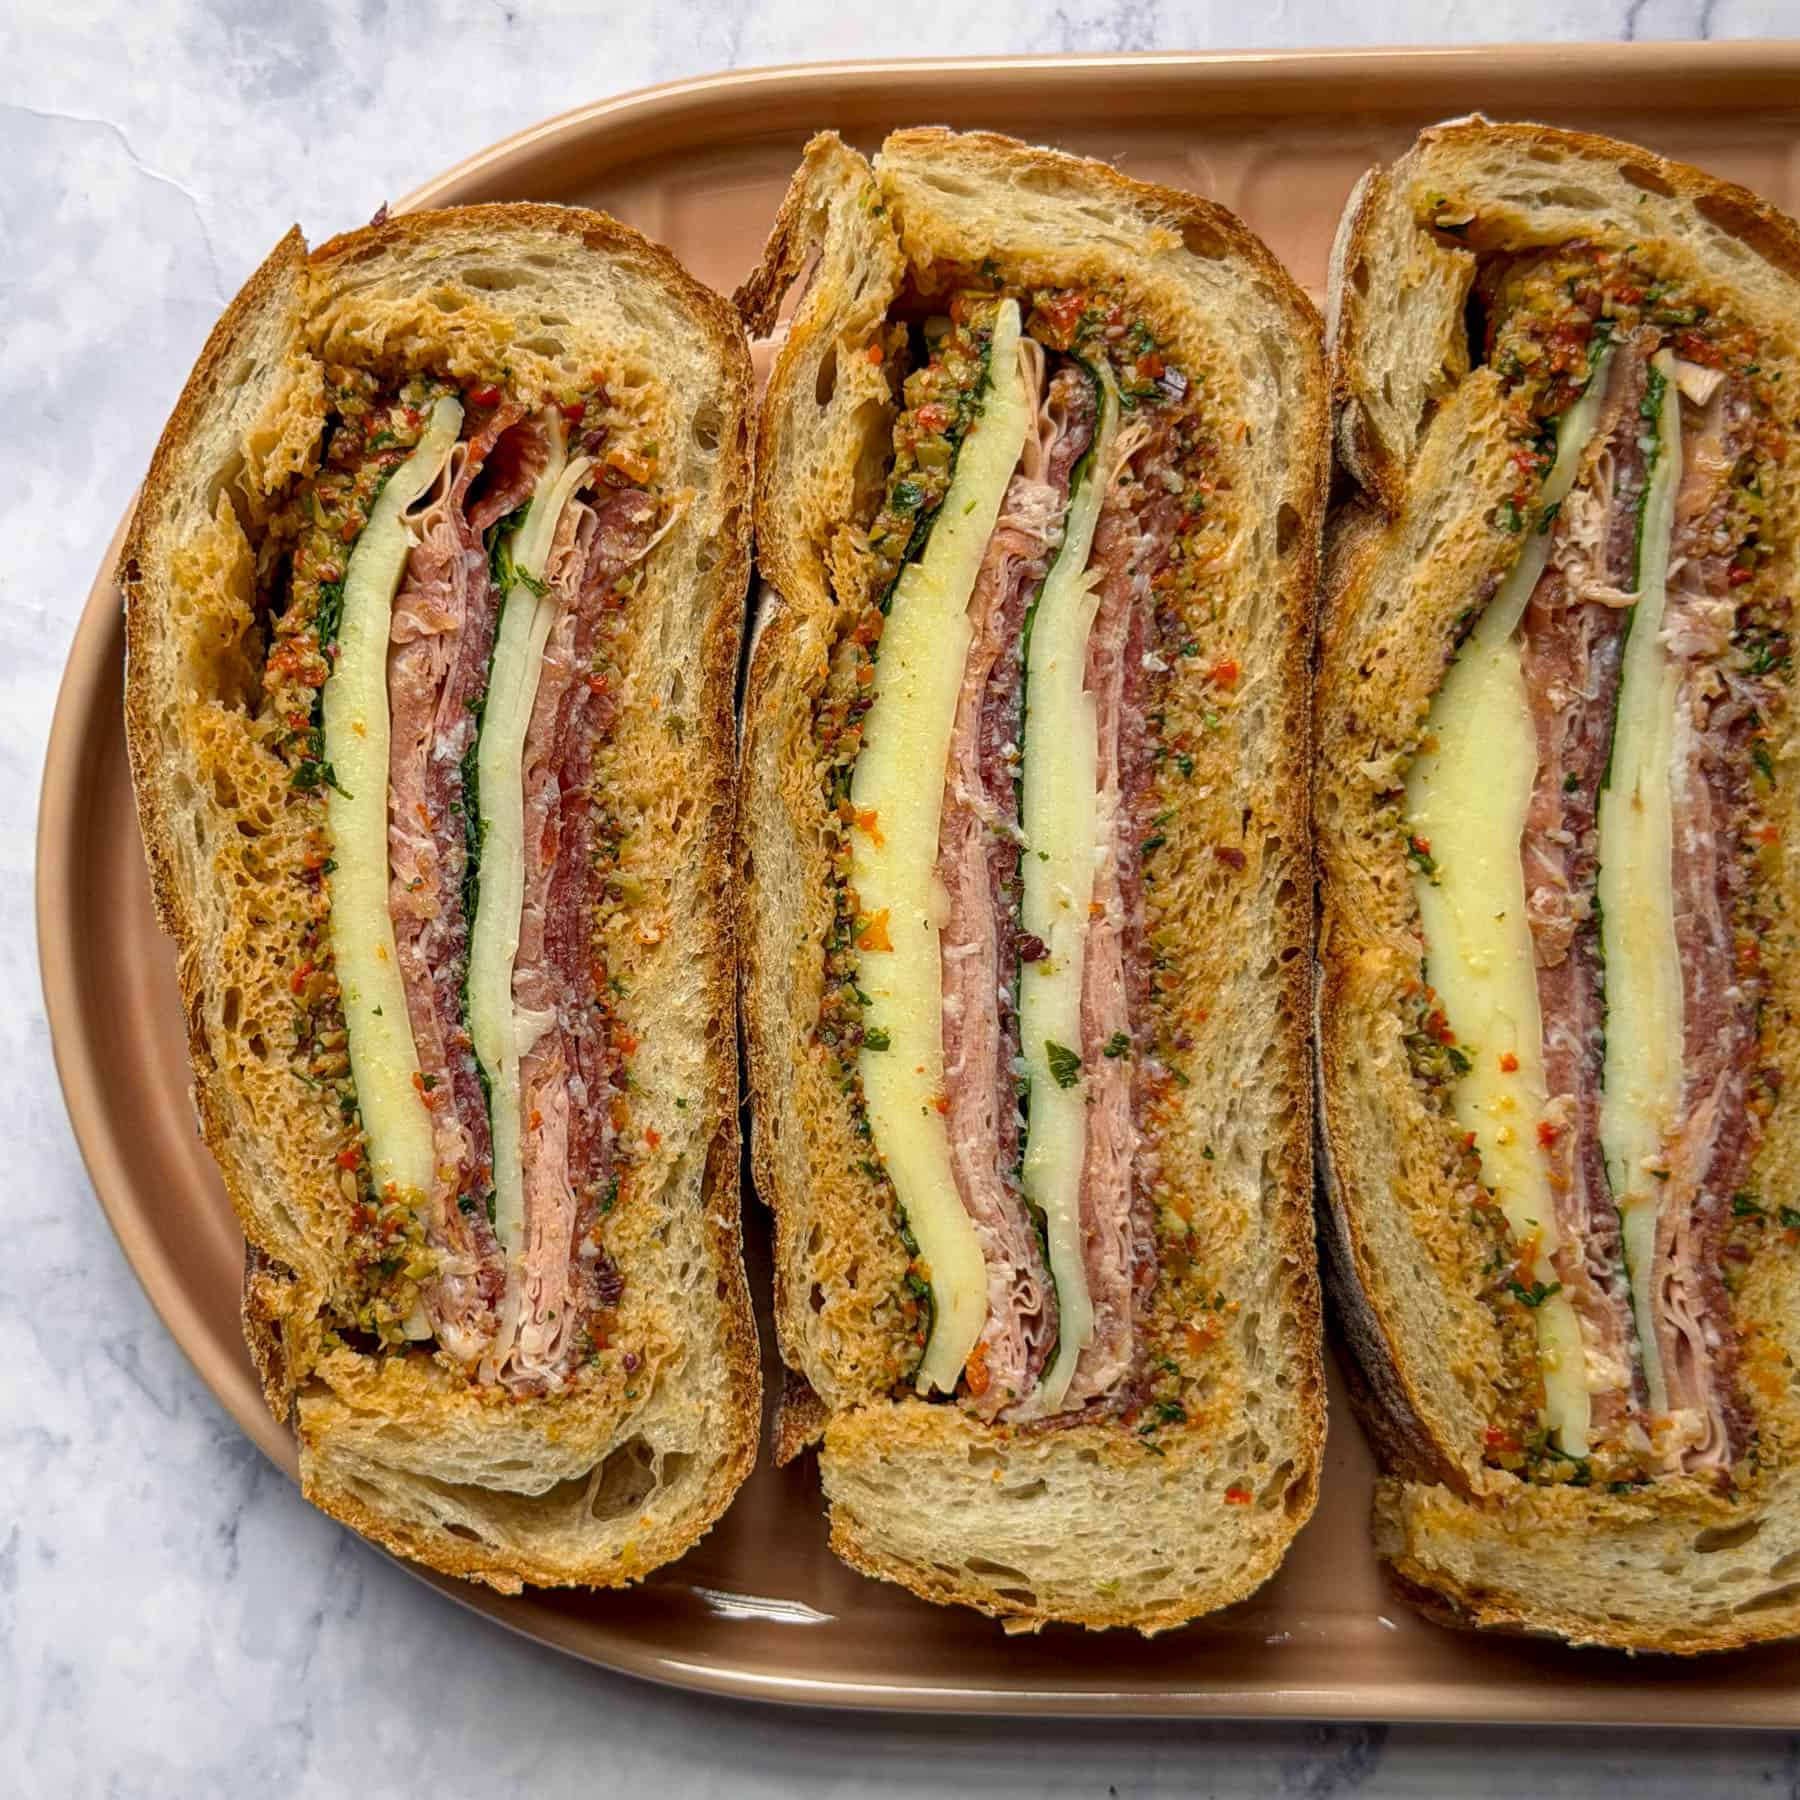
For a more substantial meal, slice it horizontally and use it as sandwich bread. Grilled vegetables, mozzarella, or roast chicken all work beautifully. The texture holds up well, even when filled. You can also toast slices the next day and top with eggs or avocado. Its versatility is part of its charm. Whether as a side, a base, or the main event, focaccia always fits the bill.
Storing and Reheating Tips
While best eaten fresh, No-Knead Focaccia keeps well for a couple of days. Store it in an airtight container at room temperature, preferably wrapped in parchment paper to retain some crispness.
Avoid refrigerating it, as this dries the crumb. To reheat, place the bread in a hot oven for 5–10 minutes until the crust re-crisps. If you like a softer finish, wrap it loosely in foil before warming. You can also freeze focaccia: wrap individual squares tightly in cling film and then foil. When ready to eat, let them thaw at room temperature and reheat as above. It’s a great way to always have good bread on hand.
More Bread Based Recipes
If you enjoyed making these No-Knead Focaccia, why not try your hand at a few other bread based recipes I have:
- Garlic Rolls: These pillowy soft rolls, infused with buttery garlic goodness, make for the ultimate comfort food.
- Flatbreads: Few things in the kitchen are as satisfying as pulling freshly baked bread out of the oven and these homemade Flatbreads, with their soft, pillowy texture and slightly chewy bite, are a perfect example.
- New York Style Bagels: Crunchy on the outside and perfectly chewy in the middle, these homemade bagels are easier to make than you might think. They just take a little bit of time, which makes them perfect for a weekend baking project.
See how I make all these recipes and more over on my Instagram!
No-Knead Focaccia
Effortless and delicious!
If you find the idea of baking and/or break making daunting, this is the recipe for you! This no-knead focaccia is so easy to make and you don’t need any fancy equipment. Most importantly, it’s absolutely delicious – perfectly crisp on the outside and soft and light on the inside. It’s incredibly versatile. I topped mine with a simple garlic and rosemary topping, but you can enjoy it plain or top it with anything you’d like.
- Prep Time: 10 minutes
- Total Time: 6 hours
- Yield: 12 1x
- Category: Bread
Ingredients
- 500 ml warm water
- 10 g white granulated sugar
- 7 g fast action dried yeast (active dried yeast)
- 550 g strong white bread flour
- 10 g fine sea salt
- 5 tbsps high-quality extra-virgin olive oil, divided
- butter, for greasing, or greaseproof paper
For the topping (optional):
- 2 tbsps high-quality extra-virgin olive oil
- 4 garlic cloves, thinly sliced
- 4 sprigs fresh rosemary, leaves only, roughly chopped
Instructions
- Whisk the water, sugar and yeast in a medium bowl and let sit 5 minutes. It should get foamy, or at the very least, creamy. If it doesn’t, your yeast is dead and you’ll need to start again with fresher yeast.
- Add the flour and salt and mix with a rubber spatula (or wooden spoon) until a shaggy dough forms and there are no dry streaks. It should look and feel wet and sticky. Wet dough = super fluffy focaccia!
- Place 4 tbsps extra-virgin olive oil in a large bowl – emphasis on large, the dough will rise a lot! Transfer the dough to the bowl and turn to coat in the oil.
- Cover with cling film and let sit at room temperature for 4 hours, or until doubled in size. It should look very bubbly. For an even more flavourful focaccia, cover the dough with cling film and refrigerate it for a minimum of 8 hours and up to 24 hours.
- Line a 38 cm x 26 cm (approx.) roasting tin with greaseproof paper or grease generously with butter. This step might seem excessive, given the amount of olive oil this recipe calls for, but it’s absolutely necessary to prevent sticking, especially if you’re using a glass dish. Pour 1 tbsp olive in the centre of the tin.
- Back to the dough. It should now be wet, bubbly and very fluffy. We’re now going to deflate the dough using a technique I learned from @alexandracooks. Using two forks, release the dough from one side of the bowl and pull it up and over into the middle of the bowl. Turn the bowl 90 degrees and repeat. Do this two more times – this will help deflate the dough and form it into a rough ball. See video below.
- Using your hands, transfer the dough to the prepared baking tin. Pour any oil left in the bowl over the dough and turn to coat in the oil. Let rise uncovered in a dry, warm place for 2 to 4 hours, or until doubled in size.
- Place a rack in the middle of your oven and heat it to 220°c. Combine the topping ingredients in a small bowl, if using.
- To check if the dough is ready to bake, press it gently with your finger. If ready, it will leave a small indentation that slowly springs back. When the dough is ready to bake, lightly oil your fingers and dimple the focaccia all over, stretching the dough to fill the dish (if necessary). You want to be aggressive with the dimpling – the goal is to create lots of deep dimples.
- Drizzle the garlic oil over the focaccia. Bake for 25 to 30 minutes, or until golden brown and crisp and pulling away from the sides of the pan. Cut into squares and serve warm – enjoy!


3 responses
This was the best focaccia I’ve made!!! It was moist, delicious, and was even great the next day!
Yay! I’m so glad you loved it!
Can’t believe how easy and good this was! Will be making this again and again