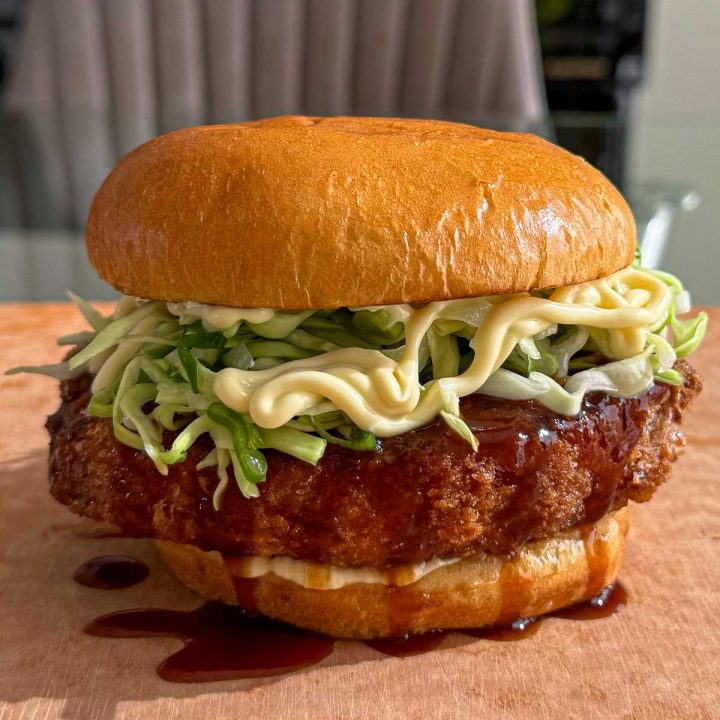
Few dishes capture the joy of crisp, golden-fried perfection quite like Chicken Katsu. This Japanese-inspired dish features tender chicken thigh fillets coated in light, airy panko breadcrumbs and fried to a satisfying crunch. The contrast between the crisp exterior and the juicy, flavourful interior makes every bite irresistible.
Traditionally served with tonkatsu sauce, a rich, sweet, and tangy condiment, Chicken Katsu is simple to prepare yet packed with flavour. Whether enjoyed on its own, paired with rice, or transformed into a katsu sandwich, this dish is a must-try for any fried chicken enthusiast.
Table of Contents
- Ingredient Breakdown
- Getting Perfectly Crispy Chicken Katsu
- Why Panko Breadcrumbs Make All the Difference
- Choosing the Best Cut of Chicken
- Seasoning the Flour for a Flavourful Crust
- Frying Tips
- More Chicken Recipes
Ingredient Breakdown
- Chicken thigh fillets: Boneless, skinless thighs stay juicy and tender during frying.
- Plain flour: Helps the egg and panko coating stick to the chicken.
- Fine sea salt: Enhances the natural flavour of the chicken.
- Garlic granules: Adds a savoury depth to the seasoned flour.
- Onion granules: Complements the garlic and enhances the umami profile.
- Ground white pepper: Provides a mild, earthy heat.
- Large eggs: Binds the flour and breadcrumbs together for an even coating.
- Panko breadcrumbs: These Japanese breadcrumbs create the signature crispy texture.
- Vegetable oil: Ensures even frying and a golden crust.
- Tonkatsu sauce: A sweet and tangy condiment that pairs perfectly with the crispy chicken.
Getting Perfectly Crispy Chicken Katsu
Achieving the perfect Chicken Katsu comes down to a few key techniques. First, pounding the chicken to an even thickness ensures even cooking, preventing overcooked edges and undercooked centres. The dredging process, flour first, then egg, then panko, is crucial for creating a solid, even coating that locks in moisture. Pressing the panko firmly onto the chicken helps it adhere properly, preventing gaps that could lead to uneven frying.
Frying at the right temperature is equally important: too low, and the chicken absorbs excess oil; too high, and the crust burns before the meat cooks through. Medium-high heat, around 170°C, is ideal. Letting the fried katsu rest on a wire rack prevents sogginess, keeping the crust light and crisp. Master these steps, and you’ll have restaurant-quality Chicken Katsu every time.
Why Panko Breadcrumbs Make All the Difference
The light, airy texture of panko breadcrumbs is what sets Chicken Katsu apart from other fried chicken dishes. Unlike traditional breadcrumbs, which can be dense and heavy, panko has a coarser, flakier texture that results in a crisp, delicate crust.
Panko is made by baking bread in large sheets without a crust, then grinding it into irregularly shaped flakes. These flakes absorb less oil than standard breadcrumbs, ensuring the chicken remains crunchy without becoming greasy. Using panko instead of regular breadcrumbs is essential for achieving the authentic crispness that makes Chicken Katsu so satisfying. To maximise its effect, always press the panko firmly onto the chicken, ensuring a thick, even coating. If possible, opt for Japanese panko brands, as they tend to have a superior texture and consistency.
Choosing the Best Cut of Chicken
Chicken thighs are the best choice for Chicken Katsu because of their higher fat content, which keeps them juicy and flavourful during frying. Unlike chicken breasts, which can dry out quickly, thighs remain tender even after prolonged cooking. Their natural richness pairs beautifully with the crisp panko coating and the sweet tanginess of tonkatsu sauce.
If you prefer using chicken breast, consider butterflying and pounding it to an even thickness to ensure even cooking. While thighs provide superior juiciness, the right preparation technique can make chicken breasts a viable alternative. Whichever cut you choose, always season the meat well before coating to enhance the final flavour.
Seasoning the Flour for a Flavourful Crust
Many people focus on the panko when making Chicken Katsu, but the seasoned flour plays an equally crucial role. The flour layer acts as a glue, helping the egg and breadcrumbs adhere properly to the chicken. More importantly, seasoning the flour with garlic granules, onion granules, salt, and white pepper ensures the chicken is flavourful from the first bite.
Without a well-seasoned base, the crispy coating can taste bland. Mixing the seasoning evenly into the flour prevents pockets of concentrated flavour and ensures a balanced taste throughout. A light dusting is all that’s needed. Too much flour can create a thick, doughy layer that affects the crispiness. For an extra flavour boost, some cooks add a pinch of cayenne pepper or smoked paprika to the flour mixture.
Frying Tips
Frying technique is the key to achieving golden, crispy Chicken Katsu. The oil temperature should stay around 170°C. Hot enough to create a crisp crust without burning the exterior before the chicken cooks through. Using a deep, heavy-bottomed pan helps maintain an even temperature. Frying in batches prevents overcrowding, which can lower the oil temperature and lead to soggy katsu.
Each piece should sizzle gently upon contact with the oil; if the oil isn’t hot enough, the coating will absorb too much grease, resulting in a heavy texture. Once fried, draining the chicken on a wire rack instead of paper towels prevents the underside from becoming soggy. If cooking multiple batches, keep the fried pieces warm in a low oven while finishing the rest. These small adjustments ensure a consistently crispy, delicious Chicken Katsu every time.
More Chicken Recipes
If you’ve enjoyed making this Chicken Katsu, here are some more of my recipes I think you’ll like:
- Chicken Parm: A classic chicken parm, no frills. Crispy golden chicken, rich tomato sauce and plenty of melted cheese.
- Chicken Kebabs: These North African-inspired chicken kebabs are delicious, juicy and packed with flavour! Added bonus: they’re incredibly easy to make.
- Chimichurri Chicken: Chicken so good it’ll make you dance! The chicken is marinated in a tasty combination of herbs and spices then seared until perfectly cooked and juicy.
- Kimchi Chicken Katsu: This kimchi chicken katsu recipe puts a Korean spin on a Japanese classic. The chicken gets marinated in kimchi juice, before being breaded and fried to golden perfection.
- Chicken Biryani: This recipe is an homage to the iconic Hyderabadi Biryani, a perfect blend of Mughlai and Telugu culinary traditions.
See how I make all these recipes and more over on my Instagram!
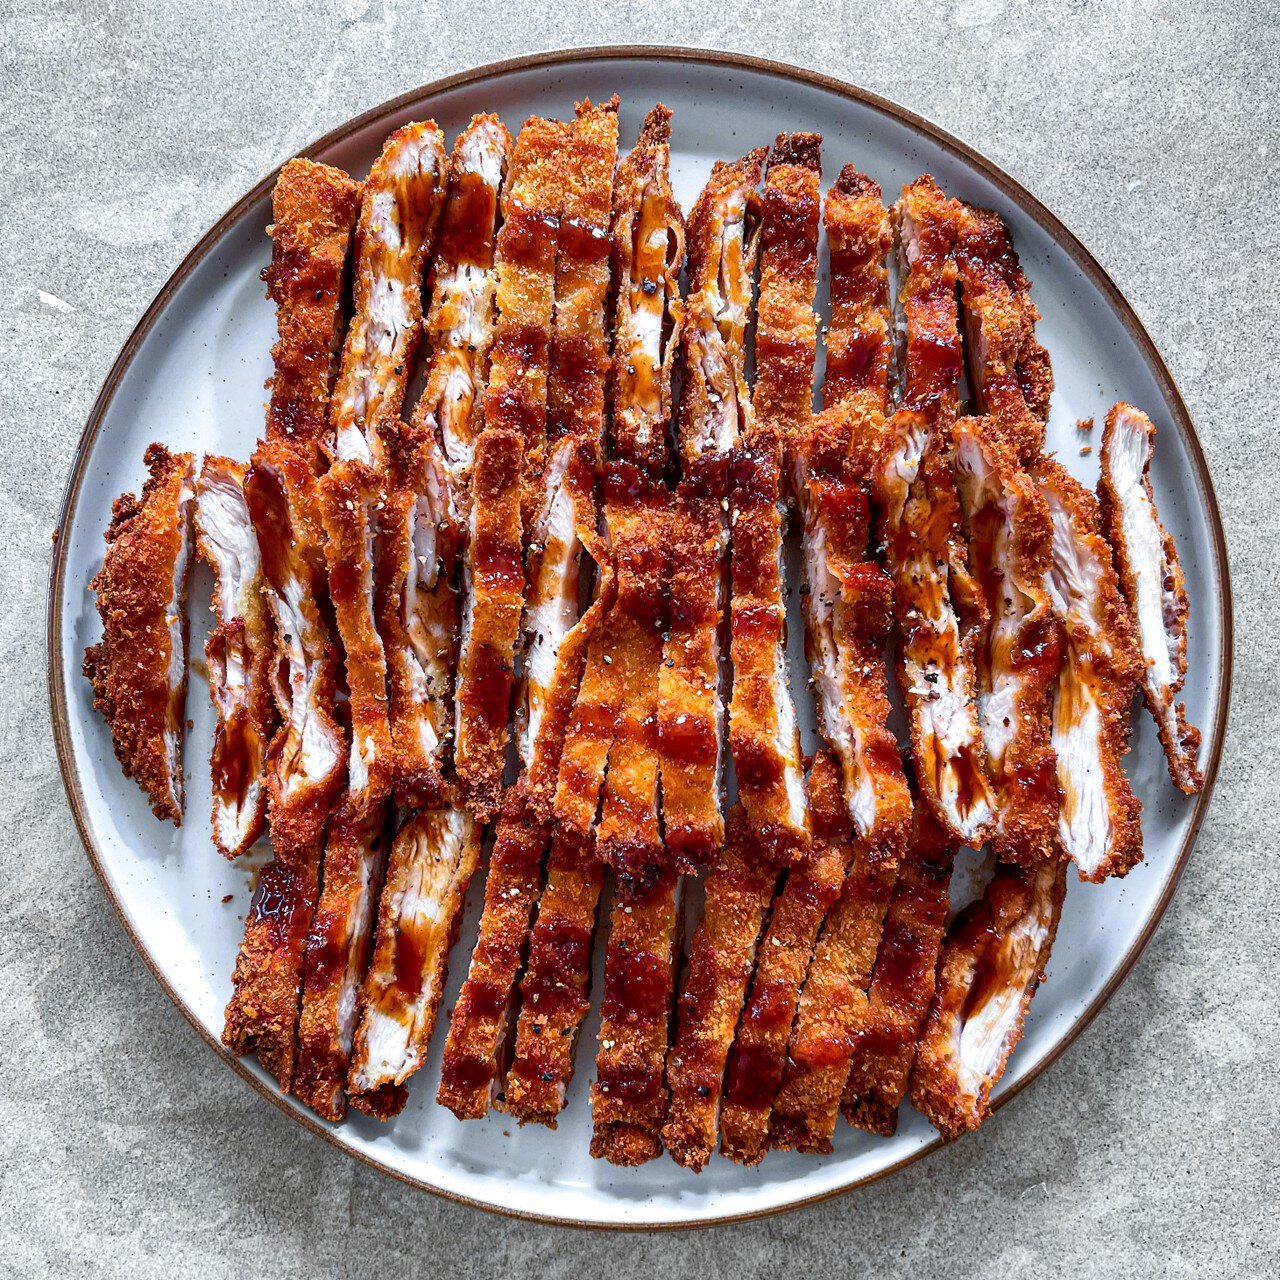
Chicken Katsu

Chicken thigh fillets pounded until thin, dredged in seasoned flour, eggs and panko, and fried until golden brown. They’re shatteringly crisp on the outside and juicy on the inside. Serve with tonkatsu sauce, which is a sweet, tangy Japanese sauce that can be found in most Asian supermarkets.
- Prep Time: 15 minutes
- Total Time: 35 minutes
- Yield: 6 1x
- Category: Chicken
Ingredients
- 65 g plain flour
- 2 tsps fine sea salt
- 2 tsps garlic granules
- 2 tsps onion granules
- ½ tsp ground white pepper
- 2 large eggs
- ¼ tsp fine sea salt
- 150 g panko (Japanese breadcrumbs)
- 6 chicken thigh fillets (boneless, skinless)
- 750 ml vegetable oil, or as needed, for frying
Instructions
- Combine the flour, salt, garlic granules, onion granules and white pepper in a bowl. You want to ensure that everything is well-incorporated so that you don’t have any salt, garlic, onion or pepper pockets. Transfer the seasoned flour to a wide, shallow bowl.
- Whisk the eggs and salt in a separate wide, shallow bowl. Place the panko on a large plate.
- Lightly pound the chicken thigh fillets to an even thickness of around ½ inch.
- Dredge 1 piece of chicken in the seasoned flour, turning to coat. Shake off any excess. Dip it in the egg, turning to coat. Let the excess drip back into the bowl. Finally, dredge the chicken in the panko, pressing firmly to help it adhere and ensuring that there aren’t any bare spots. Gently shake off any excess then transfer the chicken to a large plate or baking sheet. Repeat with the remaining chicken.
- Heat the oil in a large frying pan over medium-high heat until shimmering. Working in 3 batches, cook the chicken, turning once, until golden and crisp on both sides, around 3 minutes per side. You can reduce the heat to medium if it’s browning too quickly.
- Drain the chicken on paper towels. You can keep the katsu warm in the oven while you fry the other batches. Serve with tonkatsu sauce and enjoy!
Equipment
 Buy Now →
Notes
The equipment section above contains affiliate links to products we use and love!